 |
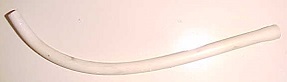
| Fig.1 Clear tubing |
Supplies and Tools:
Fluidmaster® Refill Tube Assembly - optional
Phillips screwdriver
Refill tube: Neoprene clear tubing (fig.1)
Standard scissors
Willie is a postal employee that travels 360 days a year, and has little time to work on his century studio cottage in downtown Chino, California. Willie called my repair service to solve a his toilet leaking all over the floor.
This post show the nine steps for a quick fix to repair this toilet water feed problem.
Step 1: Look at the toilet bowl. Find the problem!
Step 2: Fig.1 shows the clear tubing that will replace the damage tubing inside the toilet bowl.
Step 3: Fig.2 shows the red cap is the toilet fill valve. Inside the bowl is a white tiny rubber line coming from the toilet valve to the white overflow tube. Remove this tube from the toilet. The fill tube had a hole in the middle of it and the water was leaking out of the tube spraying against the top of the toilet bowl cover and leaking on the floor. This is a low cost fix.
 |
| Fig.2 Red cap |
Step 5: Fig.3 shows the little tube in the middle of the toilet fill valve. That is where the clear tube goes.
 |
| Fig.3 Middle |
 |
| Fig.4 Fill line |
 |
| Fig.5 Scissors |
 |
| Fig.6 Screwdriver |
 |
| Fig.7 Clear tubing |
Update: DIY Advisor has New blogs check them today:
- Handyman Blog: DIY Advisor
- DIY Advisor Sitemap
- Food Blog: From Kiwis To Pistachios!
- Food Blog Sitemap
- Tool Blog: DIY Advisor Toolbox
- Tool Blog Sitemap
- Artwork Blog: Light in Dark Artwork
- Artwork Blog Sitemap
- Class-A Tests: DIY Class-A Drivers License Tests
- Class-A Tests Sitemap: Class-A Sitemap
- DIY Poem: DIY Poem Meter Blog
- DIY Poem Sitemap: DIY Sitemap
- Cookie Alert: European Union laws requires that you know that this blog uses cookies. If you are concerned about this please click here to see how Google uses this information.
Note: The DIY Advisor assumes no liability for omissions, errors or the outcome of any jobs. The reader must always exercise reasonable caution, follow current codes and regulations that may apply, and is urged to consult with a licensed contractor if in doubt about any steps on these posts. All names were changed to protect client's privacy. DIY Advisor. Reproduction of site content including photos without permission prohibited. All rights reserved. © Copyright 2011-

Thanks...great simple fix idea. Saves time and money.
ReplyDeleteI really loved reading your blog. It was very well authored and easy to understand. Unlike other blogs I have read which are really not that good.Thanks alot! portable toilet hire
ReplyDelete