 | |||
| Fig.1 Galvanized Posts |
Tools and Supplies:
Cement (premix)
Electrical extension lines.
Electrical tape (Black plastic)
Forged steel sledge hammer with 10-inch steel handle
Hand held metal sledge
Milwaukee Torch metal blade pack
Reciprocating Saw (Sawzall®)
Personal note: I started a new DIY Class-A Drivers License Tests blog to help truck drivers pass their exams and endorsements needed for driving position. To easily find the each test and endorsements, check out Class-A Sitemap web pages.
According to Wikipedia, the free encyclopedia; a Mobile Home is called a trailer, house trailer, static caravan, a Home that is a prefabricated and built in a factory. Then the trailer is taken to Mr. Mancini new home. Harold has called my service company for over 15 years. He lives in a beautiful mobile home park located in Hollywood, California. His home was a double-wide mobile home on permanent foundation and this time he wanted to remove the old galvanized fencing post on a mobile home driveway.
Step 1: The tools: Fig.1 shows one of the fence posts that need to be cut down. Fig.2 shows the tools that were used to remove these posts. Two sets of electrical extension (top yellow has lighted plug ends 12/3and HDX middle orange) and a (bottom) is the Dewalt reciprocating saw with a Torch metal blade. For this job I used 4-Torch metal blades as some of the post had other metals or concrete inside the fencing posts. Fig.3 shows black electrical tape used to attach each set of electrical ends together.
 |
| Fig.2 The Tools |
 |
| Fig.3 Electrical tape |
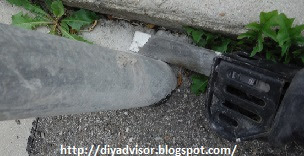 |
| Fig.4 Cutting # 1 |
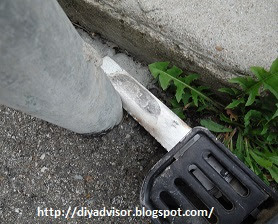 |
| Fig.5 Cutting # 2 |
 |
| Fig.6 Cutting # 3 |
 |
| Fig.7 Cutting # 4 |
 |
| Fig.8 Cutting # 5 |
 |
| Fig.9 Hammering #1 |
|
| Fig.10 Hammering #2 |
 |
| Fig.11 Hammering #3 |
 |
| Fig.12 Cement |
- Handyman Blog: DIY Advisor
- Food Blog: From Kiwis To Pistachios!
- Artwork Blog: Light in Dark Artwork
- Class-A Tests: DIY Class-A Drivers License Tests
- Class-A Tests Sitemap: Class-A Sitemap
- Cookie Alert: European Union laws requires that you know that this blog uses cookies. If you are concerned about this please click here to see how Google uses this information.
Note: The DIY Advisor assumes no liability for omissions, errors or the outcome of any jobs. The reader must always exercise reasonable caution, follow current codes and regulations that may apply, and is urged to consult with a licensed contractor if in doubt about any steps on these posts. All names were changed to protect client's privacy. DIY Advisor. Reproduction of site content including photos without permission prohibited. All rights reserved. © Copyright 2011-
