 |
| Fig.1 Tools |
By Gary Boutin
Supplies and Tools:
Blue gloves
Blue painter's tape
Clear plastic film
Cutting brush
Film clear 3 millimeter
FrogTape® Green Painter's tape
Paint interior flat
Paint can opener
Paint roller cover
Paint frame
Paint stir stick (Free)
Painter's tarps
Mrs. Jujube wanted her hallways between her two bedrooms painted. She was having company and wanted all the discolored paint to be freshen up.
This post shows the twelve steps to paint an interior hallway between two bedrooms, laundry unit and a bathroom.
Step 1: Fig.1 shows the tools used for this job.
Roller cover and paint frame, cutting brush, paint can opener, blue gloves, paint tray liner, paint stir stick and paint tarp.
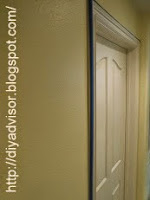
Step 2: Fig.2 and Fig.3 shows the application of Blue painter's tape along the edges of the door jamb.
 |
| Fig.2 Door edge taped |
 |
| Fig.3 Door edges taped |
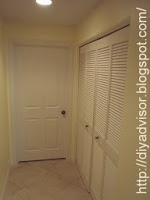
Step 3: Fig.4 and fig.5 shows all the doors have clear film over each door and the painter's tarp has been applied to the floor.
 |
| Fig.4 bedrooms #1 + #2 |
 |
| Fig.5 Bedroom #2 |
Step 4: Fig.6 shows laundry doors and the bathroom door had clear film placed over the door.
 |
| Fig.6 Laundry + Bathroom |
Step 5: Fig.7, through fig.9 shows unit plug was taped.
 |
| Fig.7 Duplex taped |
 |
| Fig.8 Thermostat taped |
 |
| Fig.9 Fire alarm taped |
Step 6: Fig.10, through fig.12 shows the application of FrogTape® tape to the ceiling edges.
 |
| Fig.10 Hallway bedroom ceiling #1 |
 |
| Fig.11 Hallway bedroom ceilings #2 |
 |
| Fig.12 Bathroom/laundry ceiling |
|
|
Step 7: Fig.13, through fig.15 shows the pictures hooks painted around, and wall door plaques were also painted.
 |
| Fig.13 Nail painted |
 |
| Fig.14 picture hook painted |
 |
| Fig.15 door knob plate painted |
Step 8: Fig.16, and fig.17 shows that cutting took place before the walls were rolled.
 |
| Fig.16 Interior flat paint |
 |
| Fig.17 Step ladder for cutting |
Step 9: Fig.18, and fig.19 shows the hallway walls were rolled with two coats of paint.
 |
| Fig.18 Rolling bedroom #1 |
 |
| Fig.19 Rolling with paint stick |
Step 10: Fig.20, through fig.22 shows that the painter's tape is being removed from the baseboards and the ceiling areas.
 |
| Fig.20 Removing Blue tape |
 |
| Fig.21 FrogTape® removed |
 |
Fig.22
FrogTape® removed |
Step 11: Fig.23 shows the pictures are placed back on the wall.
 |
| Fig.23 #2 Bedroom walls painted |
Step 12: Fig.24 shows the laundry side of the wall now repainted and ready for use.
 |
| Fig.24 Laundry + bathroom painted |
Update: DIY Advisor has New blogs check them today:
- Cookie Alert: European Union laws requires that you know that this blog uses cookies. If you are concerned about this please click here to see how Google uses this information.
Note: The DIY Advisor assumes no liability for omissions, errors or the outcome of any jobs. The reader must always exercise reasonable caution, follow current codes and regulations that may apply, and is urged to consult with a licensed contractor if in doubt about any steps on these posts. All names were changed to protect client's privacy. DIY Advisor. Reproduction of site content including photos without permission prohibited. All rights reserved. © Copyright 2011-


No comments:
Post a Comment