 |
| Mud knives 6-8-12 inches |
By Gary Boutin
Parts and Supplies:
120-grit sand screen
Finger (human preferably)
Joint compound
Putty knife
Wallboard sanding block
Sheetrock sandpaper or screens
Wall knife
Wet rag
Mrs. Dee wanted to upgrade her bedroom/office. She wanted the bedroom wall fixed, new baseboards to replace the missing ones, new ceiling and
walls painted and she needed this job done as fast as possible. Her new tenet would arrive in three days.
This post shows the eight wall damage repairs and how each one was repaired.
Step 1: Fig.1a and
fig.1b shows first the damage and the following pictures shows the repairs. This repair is on top of the A/C vent.
Fig.1a shows the first layer of joint compound was applied,
fig.1b shows another layer was applied to cover the metal corner bead.
Fig.1c shows the completed job.
 |
| Fig.1a Corner repair |
 |
| Fig.1b Corner repair |
 |
| Fig.1c Corner repair |
Note: Now just putting on several layer of joint compound on the damage does not mean the job is finished. Each repair must dry completely to a white color. When your hand are on top of the repair the joint compound must not be cold. If it is the repair needs
more time to dry.
Step 2: Fig.2a through fig.2c shows a large nail hole that was removed but removing the nail left a huge hole in the wall. Use a
wall knife with joint compound and run the blade over the entire hole.
Fig.2b notice the first layer of joint compound that was applied.
Fig.2c shows the hole completely filled and smooth. Now the repair had to dry.
 |
| Fig.2a The hole |
 |
| Fig.2b Smaller hole |
 |
| Fig.2c Patched hole |
Note: This small repairs will need very little sanding and some may need texture. Most of the time this can be avoided if the side of the repair are wiped off with a sponge.
Step 3: Fig.3a through
fig.3c shows scratches on the wall. This is sometime done by moving furniture. To repair this damage use the smallest scraper in your tool box, place some joint compound on the wall knife, or
putty knife and apply to fill in the scratches.
 |
| Fig.3a Wall scratches |
 |
Fig.3b
Wall scratches |
 |
Fig.3c
Wall scratches |
Note: If you do not want a flat area on your wall, use a sponge or damp rag
and remove the excess joint compound from the edge of the repair.
Step 4: Fig.4a through
fig.4c shows a wall corner that has the bottom corner bead topping completely removed from the area. This is also a normal repair, it happens when furniture is move around the room hitting the corner of the wall.
Fig.4a shows the damage,
fig.4b shows the first layer of joint compound and
fig.4c shows the final layer applied to this corner.
 |
Fig.4a Corner
bead exposed |
 |
| Fig.4b Another coat |
 |
| Fig.4c Final coat |
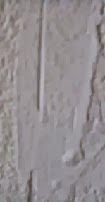
Step 5: Fig.5a through fig.5h shows the cracks in the wall being filled with joint compound. In this job the room had settled and there was wall cracks in the wallboard. Filling them with joint compound make the room look better and the paint will adhere better instead of filling the wall crack with paint. There are tools that address this problem, but a finger works better for this job than any other tools available.
 |
| Fig.5a Mud on finger |
 |
| Fig.5b Push mud in cracks |
 |
| Fig.5c More mud |
 |
| Fig.5d Cracks filled |
 |
| Fig.5e Side of A/C vent |
 |
| Fig.5f Finishing A/C vent |
 |
| Fig.5g Push mud |
 |
| Fig.5h Job finished |
Step 6: Fig.6a and fig.6b shows another area on the A/C vent that was damaged. This area was filled with joint compound, Fig.6a has some joint compound on top ready to smooth out. Fig.6b is a repair that has dried and had been sanded to a flat surface area.
 |
| Fig.6a Joint compound |
 |
| Fig.6b Area filled |
Step 7: Fig.7a and
fig.7c shows a tape damage.
Fig.7a shows that when the room was taped the wall tape did not reach the floor area, this leaving a square hole.
Fig.7b shows the wall knife used to fill this hole and
fig.7c shows the completed repair.
 |
| Fig.7a Bottom of tape |
 |
| Fig.7b Wall knife filling area |
 |
| Fig.7c Area drying |
Step 8: Fig.8a shows another A/C vent damage near the edge of the corner bead. This one was a little harder to repair because of the amount of joint compound used to fill the hole. Fig.8b shows that once filled the area had to be floated, meaning it had to be the same height around the repair. Fig.8c shows the completed repair.
 |
| Fig.8a The damage |
 |
| Fig.8b Floating the joint compound |
 |
| Fig.8c Completed repair |
How to Paint a Garage Bedroom:
Update: DIY Advisor has New blogs check them today:
- Cookie Alert: European Union laws requires that you know that this blog uses cookies. If you are concerned about this please click here to see how Google uses this information.
Note: The DIY Class-A Drivers License Tests assumes no liability for omissions, errors or the outcome of any driving tests.
The reader must always exercise reasonable caution, and follow current driving regulations that may apply for each test. All
names were changed to protect client's privacy. All rights reserved. © Copyright 2011-


No comments:
Post a Comment