 |
| Fig.1 DAP® DryDex® Spackling |
Supplies and Tools:
DAP® DryDex® Spackling
Mrs. Escarole wanted a mirror removed from the master bathroom. She had tried to remove it herself but the mirror would not budge. She called my repair service to remove a 48 by 60 inch mirror.
This post shows four steps repair the wall damage.
Step 1: Above fig.1 shows tools scissors, razor knife, tub and tile Spackle and rag to remove the mirror.
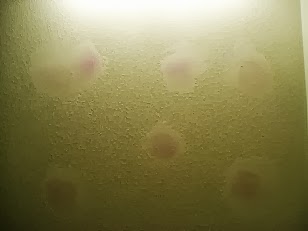
Step 2: Fig.3 shows the patches are pink because they are still pink, that the best way to tell when the Spackle is dried.
 |
| Fig.2 Pink DAP® DryDex® Spackling patches Fill damaged holes |
 |
| Fig.3 DAP® DryDex® Spackling drying white |
 |
| Fig.4 DAP® DryDex® Spackling Almost dried and turning white |
- Part 1 of 6 - Removed from Wall
- Part 2 of 6 - Wall Adhesive Removed
- Part 3 of 6 - Wall Sanded with Steel Wool
- Part 4 of 6 - Wall Spackle
- Part 5 of 6 - Textured Wall
- Part 6 of 6 - Wall Painted
Update: DIY Advisor has New blogs check them today:
- Handyman Blog: DIY Advisor
- DIY Advisor Sitemap
- Food Blog: From Kiwis To Pistachios
- Food Blog Sitemap
- Tool Blog: DIY Advisor Toolbox
- Tool Blog Sitemap
- Artwork Blog: Light in Dark Artwork
- Artwork Blog Sitemap
- Class-A Tests: DIY Class-A Drivers License Tests
- Class-A Tests Sitemap: Class-A Sitemap
- DIY Poem: DIY Poem Meter Blog
- DIY Poem Sitemap: DIY Poem Sitemap
- Cookie Alert: European Union laws requires that you know that this blog uses cookies. If you are concerned about this please click here to see how Google uses this information.
Note: The DIY Advisor assumes no liability for omissions, errors or the outcome of any jobs. The reader must always exercise reasonable caution, follow current codes and regulations that may apply, and is urged to consult with a licensed contractor if in doubt about any steps on these posts. All names were changed to protect client's privacy. DIY Advisor. Reproduction of site content including photos without permission prohibited. All rights reserved. © Copyright 2011-

No comments:
Post a Comment