 |
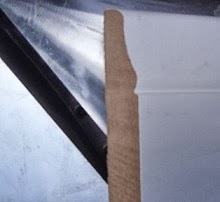
| Fig.1 Existing wood molding |
By Gary Boutin
Supplies and Tools:
Delta© compound miter saw
Existing wood molding
MDF molding
Mrs. Dee wanted to upgrade her bedroom/office. She wanted the bedroom wall fixed, new baseboards to replace the missing ones, new ceiling and walls painted and she needed this job done as fast as possible. Her new tenet would arrive in three days.
This post thirteen steps to replace the missing moldings on the bedroom.
Step 1: Fig.1 shows that the wood molding from the wall was held by two nails.
Step 2: Fig.2 shows the wood molding needs to be measured and will be replaced by the new MDF molding.
 |
| Fig.2 Measure the wall |
Step 3: Fig.3 sh
ows the wood molding, now removed from the wall. The molding was placed on the
compound saw and the miter blade was set to 45 degree cut and on the
Delta© compound miter saw. If you are not sure use a level to make sure the cut is correct. Use a wood block to bring up the molding so it can be cut correctly otherwise the cut will be the correct vertical cut.
 |
| Fig.3 - 45 Degree cut |
Step 4: Fig.4
shows that if the molding is not leveled horizontally, the cut will not be correct. Notice how the back side of the molding is on the cement
and the front side is on the saw. To cut the molding correctly, both
sides need be be leveled.
 |
| Fig.4 Molding not horizontal |
Below Fig.5 shows the use of a wood level that can be used to
level the molding.
 |
| Fig.5 Wood level |
Step 5: Fig.6 shows the wood molding is cut at a
45 degree angle, ready for the next piece to be added.
 |
| Fig.6 - 45-degree cut |
Step 6: Fig.7 shows the new MDF molding cut to fit the area. The 45 degree cut is the industry standard to add more molding to existing molding.
 |
| Fig.7 The new molding |
Step 7: Fig.8 shows the old wood molding is going to be nailed into the wall using a air compressed
brad nailer.
 |
| Fig.8 Nailing old molding |
Step 8: Fig.9 shows that after the
primed molding has been cut and mitered on both sides than the piece needs to be place to see if it is the correct fit. Here slightly too large need to cut off 1/16 of an inch.
 |
| Fig.9 New and old side by side |
Step 9: Fig.10 shows an
air compressor with a
25-ft compressed air hose that will be used to provide the air power for the brad nailer. The air pushes the brad into place.
 |
| Fig.10 Compressed air |
Step 10: Fig.11 shows the
brad nailer placing the brads into the new and old moldings.
 |
| Fig.11 Brad nailer |
Step 11: Fig.12 shows the brad nailer placing a brad at the top of the moldings. Notice how the new molding is looking tighter to the wall.
 |
| Fig.12 Nail 45 degree angle |
Step 12: Fig.13 shows the brad gun nailer nailing the top of the new molding against the wall.
 |
| Fig.13 Top rail |
Step 13: Fig.14 shows the brad nailer placing the last brad into the opposite side of the molding.
 |
| Fig.14 Corner nail |
How to Paint a Garage Bedroom:
Update: DIY Advisor has New blogs check them today:
- Cookie Alert: European Union laws requires that you know that this blog uses cookies. If you are concerned about this please click here to see how Google uses this information.
Note: The DIY Advisor assumes no liability for omissions, errors or the outcome of any jobs. The reader must always exercise reasonable caution, follow current codes and regulations that may apply, and is urged to consult with a licensed contractor if in doubt about any steps on these posts. All names were changed to protect client's privacy. DIY Advisor. Reproduction of site content including photos without permission prohibited. All rights reserved. © Copyright 2011-


No comments:
Post a Comment