Showing posts with label flat head screwdriver. Show all posts

Wednesday, October 21, 2015

How to Rewire a Lamp Part 1 of 2 - Taking Apart the Lamp

Fig.1 Westinghouse 
Make-A-Lamp Kit
By Gary Boutin

Tools and supplies 
Flat head screwdriver
Lamp kit
Pliers
Electrical tape

I inherited this lamp from my mother. The lamp is about 15 years old and it doesn't match anything in the bedroom. But it's special to me and worth saving.

This post shows the eleven steps on how to take apart a lamp.

Step 1: This Westinghouse Make-A-Lamp Kit that contains everything needed to rewire a lamp. This lamp kit was purchased from The Home Depot. Fig.2 shows the lamp kit repair logo.
Fig.2
Westinghouse 
Make-A-Lamp Kit
Step 2: Fig.3 show the lamp interior, the bulb base rotated and the electrical cord was twisted inside the lamp. Remove the finial (white porcelain screw) to release the lamp shade. Fig.4 shows a lamp harp that holds up the white shade and white porcelain finial ball. Squeeze both sides of the lamp harp and pull up the harp sleeves to remove it from the lamp body. Harp Sleeves are located at the bottom of the harp.
Fig.3 Finial porcelain ball
Fig.4 Harp
Step 3: Fig.5 shows this old damaged brass lamp socket comes with a decorative key to turn the lamp on or off. The decorative white plastic below the lamp socket will be removed and not reused.
Fig.5 Brass lamp socket
Step 4: Fig.6 shows the lamp socket seal needed to be cut to remove the top part of the socket. The brass arms coming on the sides are the harp base that is attached to the neck of the lamp. Fig.7 shows that the lamp socket was pulled from the lamp showing an inner cardboard sleeve.
Fig.6 Lamp socket seal
Fig.7 Lamp socket 
has two layers
Step 5: Fig.8 and fig.9 shows that once the exterior brass covering has been removed, the electrical wire has been attached by two screws. Using a flat head screwdriver turn counterclockwise to unscrew the metal screws releasing the electrical wires.  

Note: As a safety measure the electrical cable has a knot to prevent the electrical cord from being pulled out of the lamp socket.
Fig.8 Electrical Leads
Fig.9 Wire knot
Step 6: Fig.10 shows that underneath the lamp socket is a wire knot needed to be removed to get the wires out of the lamp. Fig.11 shows the old lamp socket ready for the trash can.
Fig.10 Remove wires
Fig.11 Internal lamp socket
Step 7: Fig.12 shows the twisted electrical cord still inside the lamp.
Fig.12 Twisted cord
Step 8: Fig.13 shows remove the electrical leads. Remove the lamp wire by pulling from the bottom of the lamp. Fig.14 shows the bottom of the lamp, next peel of the cardboard exposing the lamp cord.
Fig.13 Electrical cord
Fig.14 Peeling cardboard
Step 9: Fig.15 shows the bottom of the lamp socket that has an internal threads attached to the lamp neck. Fig.16 shows the lamp post with male threads (external threads). Take apart the lamp neck by unscrewing the brass screw above the white decorative neck.
Fig.15 lamp neck/harp bottom
Fig.16 External neck
Step 10: Fig.17 shows the vase cap with a cork washer and fig.18 shows the porcelain lamp base.
Fig.17 Vase Cap with 
cork washer
Fig.18 Porcelain Lamp Base
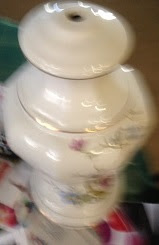
Step 11: Fig.19 shows a side view of the porcelain lamp base.
Fig.19 Side of lamp

How to Rewire a Lamp


Update: DIY Advisor has New blogs check them below today:

  • Cookie Alert: European Union laws requires that you know that this blog uses cookies. If you are concerned about this please click here to see how Google uses this information.


Note: The DIY Advisor assumes no liability for omissions, errors or the outcome of any jobs. The reader must always exercise reasonable caution, follow current codes and regulations that may apply, and is urged to consult with a licensed contractor if in doubt about any steps on these posts. All names were changed to protect client's privacy. DIY Advisor. Reproduction of site content including photos without permission prohibited. All rights reserved. © Copyright 2011-2015
 

Saturday, March 2, 2013

Garage Epoxy - Part 3 of 10 - Rat Ate Electrical Wire Repair

Fig.1 Damaged Wire
By Gary Boutin

Supplies and Tools:
2012 National Electrical Safety Code (N.E.S.C.)
Electrical cord and cord holder 
Electrical tape
Electrical radial saw
Flat head screwdriver (electrical) 
NM (Non-metallic electrical wire)
Tape measure

Rue Phon called my repair service to clean up his laboratory rats on the loose in his garage. He owned a beautiful home overlooking Azusa Hills, California. In this post my partner Carl will be helping me solve and work out the details of the job. 

This post shows the eight steps to solve this damaged electrical wire from rat attacks.

Rats' teeth keep growing and they enjoy chewing on things to keep those teeth in shape. Their teeth grow non-stop and they must chew all the time in order to wear down their teeth. Rats often choose to chew on electrical wires which can lead to electrical fires. Note: Rats need to chew to keep their teeth under control. The rats chewed the external electrical wiring.

Step 1: Identify the problem and check the rat chewed electrical wires. Check for any missing outer layer inside the Romex® cabling. If its missing replace that piece of wiring. Check with your local (NESC) National Electrical Safety Code and Electrical Codes to see how much wire you will need to replace.  

Tip: If you are not sure find an electrician to help you decided. 

Step 2: Repair the Romex® cables, also called NM wiring. Fig.1 through fig.3 shows the damage done to the electrical wiring. The cable sheathing was eaten away by the rats, but not the internal wires. Instead of removing and replacing the Romex® cables Mr. Phon wanted these wires to be repaired instead of replaced. 
Fig.2 Rats ate Romex® cables
Fig.3 Romex® cables
Step 3: Fig.4 shows the Romex® cables were repaired by wrapping electrical tape around the damaged art of the electrical sheathing.

Note: If the rats ate through the wiring then replace the entire length of the run.

Step 4: Fig.5 shows Carl repairing the Romex® wiring before replacing the garage cabinets.
Fig.4
Fig.5 Carl Replacing 
damaged wires
Step 5: Fig.6 and fig.7 shows that Carl used a radial saw to cut into the 2x4 wood braces to protect the Romex® wiring for further damage and possible pinching from installing the garage cabinets. This process prevents pinching the electrical wiring. Fig.8 shows the Ryobi radial saw and the electrical cords used for these steps.
Fig.6 Carl cut a groove
to protect wires
Fig.7 Romex® wiring

Fig.8 Ryobi radial saw
Step 6: The electrical outlet internal wires were damaged by the rats. Fig.9 and fig.10 the problem was solved by cutting the damaged part of the wire and re-wiring the duplex receptacle. Turns out there was plenty of additional wiring on the outside cabinet assembly that the handyman was able to pull enough Romex® wire to repair this receptacle. A flat screwdriver to used to place the hot (black) and common wire (white) in the receptacle plug. 
Step 7: Do not forget to wire the ground, the copper wire goes to the green screw on the electrical outlet. Fig.10 shows the ground is located at the bottom of the picture.
Fig.9 Wiring
Fig.10 Ground
Step 8: The electrical Romex® wiring has been repaired, this job is finished.

Garage Epoxy:


Friday, February 8, 2013

How to Change Air Gap on a Kitchen Sink

Chrome Air Gap Cover
By Gary Boutin 

Supplies and Tools:
Air gap chrome kit
Flat head screwdriver
Hose clamps-2
Garbage disposal rubber hose 7/8 inch

Dr. Johnson called me because his dishwasher smelled bad. Dr. Johnson's home is located in beautiful downtown Rancho Cucamonga, California. He has a 3 bedroom overlooking a race tract. He had owned his dishwasher for over 12-years, trouble free until now. He did not want to replace the dishwasher but he did want the problem solved.

This post shows the eight steps used to replace the garbage disposal hose and twisted air gap.


There are several ways to attached the hoses and install the air gap, below are two example:
  1. Install the air gap on the sink and then install both hoses from the bottom of the sink to the air gap. 
  2. Attach the hoses to the air gap and then install the air gap to the sink. Either way its going to be difficult, but it must be done. Make sure all the soap containers, sponges, and other cleaners have been removed from the sink cabinet, your physical body will need the extra room.
Step 1: Fig.1 shows the garbage disposal is being checked to see if it was plugged. The garbage disposal was draining but it was also leaking badly, including the Garbage Disposal Rubber Hose was split and kinked and the clamp was not in the correct location. The kitchen cabinet had a huge puddle under the garbage disposal. 
Fig.1: Garbage disposal rubber hose

Step 2: Fig.2 shows the Black Rubber Hose on the left goes to the Garbage Disposal and the grey smaller tube on the air gap comes from the dishwasher.  
Fig.2 Air gap dishwasher 
and garbage disposal hose

Step 3: Fig.3 and fig.4 shows the nut is in the middle of the air gap. Push the unit below the sink and swapped the old air gap for the new air gap and removed both hoses.
Fig.3 Bottom of air gap
Fig.4 Air gap removed from sink
Step 4: Fig.5 shows the flat tip screwdriver used to remove the hose clamp on the dishwasher hose.
Fig.5 Tightened hose clamp

Note: Make sure that you place the hose clamp on the hose before you force the hose on the air gap.

Step 5: Fig.6 shows the new garbage disposal hose attached to the new air gap under the sink and the other end is attached to the garbage disposal using a new hose clamp. 
New air gap with out hoses
Fig.6: Garbage hose 
no clamp on new air gap
Step 6: Fig.7 shows both new hoses on the air gap. The dishwasher gray hose has been attached by a new hose clamp instead of a hose clip.
Fig.7 Both hoses
Top of air gap
Step 7. The leak test, turning on the kitchen faucet and the garbage disposal to make sure there is not leaks. In this case no leaks came from the hoses attached to the garbage disposal.  
Step 8. Run the dishwasher a full cycle to see if was emptying and there was no leaks below the sink area, plus the garbage disposal emptied several times through the complete cycle. 

Update: DIY Advisor has New blogs check them today:

  • Cookie Alert: European Union laws requires that you know that this blog uses cookies. If you are concerned about this please click here to see how Google uses this information.

Note: The DIY Advisor assumes no liability for omissions, errors or the outcome of any jobs. The reader must always exercise reasonable caution, follow current codes and regulations that may apply, and is urged to consult with a licensed contractor if in doubt about any steps on these posts. All names were changed to protect client's privacy. DIY Advisor. Reproduction of site content including photos without permission prohibited. All rights reserved. © Copyright 2011-