Showing posts with label compound saw. Show all posts

Thursday, January 8, 2015

How to Make Backyard Wood Blind to Cover a Hole in Block Fence

Fig.1 The blind
By Gary Boutin 

Supplies and Tools:
1x6x8 redwood Tongue and Groove (2)
2x2x8 redwood lattice (2)
Clamps 
Compound saw or hand saw 
Deck screws 1 1/4 in.
Lattice beige vinyl cap molding 
                      3/4 in. x 1 in. x 4 ft
Tapcon polymer plated steel hex-washer-head indoor/outdoor 
                  concrete anchors 1/4 in. x 2-3/4 in.
Titebond glue 
Wood drill bit
Wood glue

Jim came to The Home Depot to place a wooden shutter from his backyard block wall. Some time ago he had a hole made in his block wall so he could see the valley from his home. Now the green valleys are filled with new homes. He came to the Anaheim Super Store - Lumber/Building Materials area for information and wanted information on redwood screen.

This post shows the seven steps to assembling block wall blind.

Step 1: Arrive at your nearest The Home Depot and talk to an associate.  If your project involves working with wood ask for the location of Lumber/Building Materials.
Step 2: Fig.1 shows a picture that Jim brought to me to explain the problem. The brown area is the area of concern. The Home Depot carries Douglas Fir tongue and groove will be used across the expanse of the missing block.
Step 3: Fig.2 shows that Jim decided to purchase 1x6x8 redwood tongue and groove. He had both boards cut in half by a lumber associate. Below the wood is being cut to size.
Fig.2 Cutting the planks
Step 4: Now Jim wanted an easy but good looking wood edge to lay on the brick wall. I showed him the mill works area but none fitted correctly against the Tongue and Groove planks. I brought him to the garden area where the 2x2 plastic channel were being stored. 
Step 5: Fig.3 shows we decided on using beige vinyl cap molding. The planks once glued would be surrounded by the molding. It worked perfectly except the sides of the wood screen. Another molding was cut to accommodate the sides of the wood screen.
Fig.3 Laying all the planks 
and cap molding on the floor
Step 6: Fig.4 shows the final assembly to show Jim how to assemble the project.

Fig.4 Final check
Step 7: Blind instructions:
  1. The glue to use on the edges of the tongue and groove boards, make sure the boards are flat and the ends even. Each board is 5-1/2 wide and 4-foot long for a total 2-boards totaling 11 in. long.
  2. Use wood clamps to clamp each end of the boards.
  3. When the board are together cut off the groove side of the board. Removing the groove will give the board a larger flat area.
  4. After the boards are glued together, place the top and bottom cap on each side.
  5. Drill three holes in each cap molding approximately 4-inch on each end and 24 in. the middle hole.
  6. Fig.5 shows that the insertion of three deck screws into the plastic cap and into the tongue and grove boards and two more on each end.
  7. Do this on both horizontal side.
  8. Now insert the deck screws on the lateral side.
  9. Now pick up the entire unit and place it on top of the cement wall. To secure the panel to the brick wall drill into the wood cap first and another hole into the cement. Using Tapcon polymer plated steel hex-washer-head indoor/outdoor concrete anchors 1/4 in. x 2-3/4 in. This is the very best anchoring system. For more information click on Tapcon above.
Fig.5 Deck screw locations
Jim never came by to show off his handiwork. So I am assuming the blind worked and he no longer had to stare at the new development that was happening near his home.  


Update: DIY Advisor has New blogs check them today:
  • Cookie Alert: European Union laws requires that you know that this blog uses cookies. If you are concerned about this please click here to see how Google uses this information.

Note: The DIY Advisor assumes no liability for omissions, errors or the outcome of any jobs. The reader must always exercise reasonable caution, follow current codes and regulations that may apply, and is urged to consult with a licensed contractor if in doubt about any steps on these posts. All names were changed to protect client's privacy. DIY Advisor. Reproduction of site content including photos without permission prohibited. All rights reserved.© Copyright 2011-
 

Tuesday, April 30, 2013

How to Hang Pre-hung Door - Part 14 of 15 - Exterior Door Molding

Fig.1 Air compressor 
and wood molding
By Gary Boutin

Supplies and Tools:
Brads
Brad nailer 
Compound saw or miter saw
Compressor and air hose 
DAP® wood filler 
Electrical cords 
Hack Saw   
Wood molding

Mr. Victor Longpont hired my services to remove his garage door that had become damaged after a bad rain storm. The door had not been painted for over 30 years, the bottom of the door was damaged by a badly worn door sweep that allowed water into the bottom of the door. 

This post shows the twelve steps to installing exterior wood molding on a pre-hung door.

Step 1: The first step after the door is sound is to replaced the stucco molding with standard wood molding. Fig.1 shows the air compressor that will be used to provide air pressure for the brad nailer that will be used in this job. Also shown is the wood molding that will be applied around the door. Fig.2 shows the wood molding that will cover the stucco patch and finish the exterior of the door. Stucco molding should have been used for this door, the edge of the door matched up with the edge of the stucco wall, so the molding could not be used and an alternative solution was used instead of stucco molding.
Fig.2 wood molding
left side
Stucco molding
Step 2: Fig.3 shows the two wood molding placed at each side of the door. The door is approximately 80 inches long. 
Fig.3 pre-hung door metal 
threshold plate
Step 3: Fig.4 shows the bottom of the molding is being cut to accommodate the bottom of the metal threshold plate. Use a mini hack saw to cut the molding.
Fig.4 cutting for 
threshold plate
Step 3: Below fig.5 shows the handyman using a brad nailer to staple the wood molding to the outside of the door. Fig.6 shows the handyman staple the bottom of the door molding.
Fig.5 Nailing wood molding
Fig.6 Applying brads 
to door molding
Step 4: Fig.7 shows that both vertical parts of the door have been cut and have been stapled to the door edge. Only the last piece needs to be added to the top of the door frame. 
Fig.7 Preparing top molding
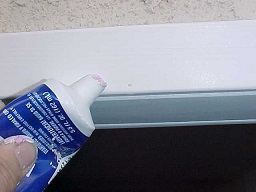
Step 5: Use DAP® wood filler that is pink when wet and dries white. 
DAP® Wood filler
Step 6: Fig.9, fig.10 and fig.11 shows that after the wood molding has been stapled to the door, the edges need to be caulked and so does the wood molding corners. Apply the wood filler in the corners and on the door side of the molding. 
Fig.8 Wood filler on corners
Fig.9 Wood filler dried
Fig.10 Dried wood filler


How to Hang a Pre-hung Door:


  • Part 1 of 15 Introduction Why Replace This Garage Door
  • Part 2 of 15 Removing The Damaged Door
  • Part 3 of 15 Door Hardware Removed
  • Part 4 of 15 Door Threshold Removal
  • Part 5 of 15 Installing Door
  • Part 6 of 15 Recycled Metal Removed
  • Part 7 of 15 Caulking Outside Door Edges
  • Part 8 of 15 New Door Hardware Installed
  • Part 9 of 15 Caulking Door Screws Holes
  • Part 10 of 15 Inside Door Mud
  • Part 11 of 15 Inside Door Taping
  • Part 12 of 15 Inside Door Painted
  • Part 13 of 15 Applying Stucco To Door Edge
  • Part 14 of 15 Exterior Door Molding
  • Part 15 of 15 Old Door Cut to Trash


  • Update: DIY Advisor has New blogs check them today:

    • Cookie Alert: European Union laws requires that you know that this blog uses cookies. If you are concerned about this please click here to see how Google uses this information.

    Note: The DIY Advisor assumes no liability for omissions, errors or the outcome of any jobs. The reader must always exercise reasonable caution, follow current codes and regulations that may apply, and is urged to consult with a licensed contractor if in doubt about any steps on these posts. All names were changed to protect client's privacy. DIY Advisor. Reproduction of site content including photos without permission prohibited. All rights reserved. © Copyright 2011-

    Sunday, March 31, 2013

    How to Install Bedroom Exterior Side Door

    Fig.1: Carl with all the supplies
    By Gary Boutin

    Supplies and Tools:
    Caulking gun
    Cordless drills with a Phillips bit
    Compound saw
    Drywall joint compound
    Electrical cords
    Latex caulking
    Level 4-foot
    Paint brushes, paint frames, roller cover, paint trays 
    Pre-hung door 30-inches
    Radial saw
    Razor knife (cut sheetrock)
    Reciprocating saw with 6-inch metal blade
    Saw horses
    Sheetrock screws 2-1/2 and 3-inch screws
    Shims - composite
    T-square 
    Utility knife and extra blades
    White Latex Primer
    Wood molding (inside and outside of door) 
    Wood putty

    A client from Wrightwood, California called my repair service to place a new door in a servant room. This job was done with my good friend Carl who helped me do this project.

    This post shows the ten steps on how to remove and replace a damaged door. 

    From Wikipedia, the free encyclopedia; Wrightwood has an elevation of 5,935 feet (1,809 meter) and a population of 4,525. This city is a pine covered valley in the San Gabriel Mountains, the area was first developed as cattle ranches and broken up into residential in 1920. Early ski enthusiasts discovered the north facing slopes of the San Gabriel Valley. Wrightwood has evolved from a vacation community to home to over 4000 full-time residents. At nearly 6000 feet in elevation, its valley is protected by the Blue Ridge to the South.

    Step 1: Enjoy the drive and bring all the tools, pre-hung door and equipment necessary to do the job. No easy hardware stores in this area so everything must be brought in by truck. Fig.1 and fig.2 shows the two plastic horses that will hold the old door and keep our tools within easy reach.
    Fig.2: Two saw horses
    Step 2: Remove the door by removing the hing pins. Place the door outside to be cut and disposed. Use electrical cords to supply power to the reciprocating saw that will cut the door out of its existing area. Sometimes to get the door out the door jamb need to be cut in the middle to remove them to the trash area. Fig.3 shows the door has been cut and placed in the trash can for disposal.
    Fig.3 Door in trash can

    Step 3: Unpacked the 30-inch pre-hung door. Remember prior to ordering the door make sure the measurement are correct. Not all warehouse stores will return a door if the measurements are incorrect. Fig.4 shows the staples being removed from the bottom of the door, the cardboard has been discarded but the information has been kept for the clients records. This door has energy credit available for income tax benefits.


    Fig.4 Bottom of pre-hung door
    Step 4: Use both a 2-foot and 4-level to level the door. Place the door in the doorway and use 3-inch screws with with composite wood shims to square the door in the existing doorway. A partner makes this step a good choice. Fig.5 shows the screw (3-inch screws) is by the brass hinge and another hole below on the door frame.
    Fig.5 Pre-hung 
    door frame


    Step 5: Fig.6 through fig.8 shows that the wood putty is being applied over the screws after the door in in place.
    Fig.6 Putty on 
    door frame

    Fig.7 Putty 
    on door jamb
    Fig.8 Putty 
    on lock side

    Step 6: Fig.9 shows the exterior door edges have had stucco applied to the external wall and the new door jamb.
    Fig.9 Stucco patch 
    by wood frame
    Step 7: After the door is in place, it  needs to be painted with primer. The wood putty needs to be sealed. Fig.10 and fig.11 shows Carl is priming the wood putty holes. Parts needed are 2-inch paint brushes, and a paint trays. Sheetrock will use up the blades (utility knife blades) so its important to keep a good supply on hand.
    Fig.10 Carl painting 
    wood frame

    Carl painting bottom 
    of wood frame

    Step 8: Fig. 12 shows Carl is working on the door threshold plate.
    Fig.12 Carl and 
    threshold plate
    Step 9: After the door was painted we worked on placing the new wood molding. The wall had to be repaired and new wall mud (drywall joint compound), tape and sheetrock screws will be screwed using a cordless screwdriver with a Phillips bit to repair the wall. Fig.13 shows the interior molding that was cut using a compound saw to cut the 45 degree angles. Use caulking gun and latex caulking after the wood molding is on the door to seal the molding to the wall. It also give the molding a finished look. Use a razor knife to cut the sheetrock and a T-square to cut it straight. This job does not require much taping and replacing sheetrock.
    Fig.13 Inside mud 
    around wood molding
    Step 10: Fig.14 shows the door is complete and the maid quarters private entrance door.
    Fig.14 Door finished
     

    Update: DIY Advisor has New blogs check them today:

    • Cookie Alert: European Union laws requires that you know that this blog uses cookies. If you are concerned about this please click here to see how Google uses this information.

    Note: The DIY Advisor assumes no liability for omissions, errors or the outcome of any jobs. The reader must always exercise reasonable caution, follow current codes and regulations that may apply, and is urged to consult with a licensed contractor if in doubt about any steps on these posts. All names were changed to protect client's privacy. DIY Advisor. Reproduction of site content including photos without permission prohibited. All rights reserved. © Copyright 2011-

    Saturday, January 26, 2013

    How to Repair Dining Room Corner Unfinished Oak Wood Floor


    Fig.1 Flooring that needs to be finished
    By Gary Boutin

    Supplies and Tools:
    Box of Oak pieces
    Caulking clear tube
    Compound saw, portable
    Compressor
    Liquid Nails adhesive
    Measuring tape 
    Table saw, portable

    Jo Walsh called after seeing my advertisement in the local paper. Jo wanted her floor repaired. She had removed two narrow bookcase and now the floor underneath the bookcase needed to be replaced to match the existing floor. She had a box of oak pieces cut in many different length and thicknesses.

    Below are eleven steps required to fix this oak wood floor.  

    Step 1: Check out the floor and the box of oak pieces to make sure it matches the existing molding. Once that is done then the job can be started, otherwise more flooring will need to be purchased and selecting oak flooring that match the existing flooring can be expensive. 
    Step 2: Above right fig.1 shows that the floor needs to be checked to make sure it is level and has no immediate flaws. For example; high points or cement abnormalities. This floor was not level, foam board were installed to level the wood planks.
    Step 3: Check out this post to see how to open the adhesive tubes.
    How Do You Open Caulking Tubes?


    Step 4: Fig.22 shows the piece on the left had to be cut with a table saw to keep the right edge with a lip and one flat edge against the wall. After measuring with a tape measure the blank area in the floor to decided with oak pieces to use next.
    Fig.2 Partial corner floor repair
    Step 5: Fig.3 shows the first piece that was the closest match to the wood piece adjacent to it. These pieces were installed one after the other except for the wall side.
    Fig.3 Adjust grain
    Step 6:  Each oak piece was glued with Liquid Nails, and sealed along the edges with clear silicone caulking. The last piece was placed on with the third piece and pried into place. There was a 1/8 inch area near the wall which allowed me to place the last piece into the floor puzzle. 
    Step 7: Fig.4 and fig.5 shows the steps that are repeated each time an oak plank was placed on the floor.
    Fig.4 Adjust color
    Fig.5 Match grain and color
    Step 8: Fig.6 shows the corner area that is finished.
    Fig.6 Finish the corner
    Step 9: Now the next area will be worked on, only the off colored pieces remained in the oak floor box.
    Step 10: Fig.7 shows t
    his piece went in easily and Liquid Nails adhesive was added to the edges of the floor lip.
    Fig.7 Adhesive used for floor

    Step 11: Fig.8 shows the side floor is finished with the off pieces of wood. A outline of the board that were placed can be seen.  But now Jo floor is finished and her family can enjoy their new flooring.
    Fig.8 Missing flooring repaired

    Update: DIY Advisor has New blogs check them today:

    • Cookie Alert: European Union laws requires that you know that this blog uses cookies. If you are concerned about this please click here to see how Google uses this information.

    Note: The DIY Advisor assumes no liability for omissions, errors or the outcome of any jobs. The reader must always exercise reasonable caution, follow current codes and regulations that may apply, and is urged to consult with a licensed contractor if in doubt about any steps on these posts. All names were changed to protect client's privacy. DIY Advisor. Reproduction of site content including photos without permission prohibited. All rights reserved. © Copyright 2011-