 |
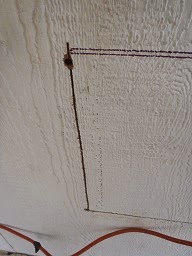
| Fig.1 Jigsaw cutting wood paneling |
Supplies and Tools:
Awl
Caulking
Caulking gun
Cordless screwdriver
Pencil #2
Phillip bit #2
Scissors
Jigsaw blade (wood)
Jigsaw Power Tool
Tyler Zowat lives in Perris, California. He had a new patio installed late last summer he purchased a wall mounted Frigidaire with a 10,000 BTU which he purchase from The Home Depot.
This post shows the thirteen steps to installing a a Portable Air Conditioner in a patio wall.
Step 1: Above right fig.1 shows Jigsaw cutting the bottom wood paneling.
Step 2: Below fig.2 shows the wood paneling has been removed.
 |
| Fig.2 Wood paneling removed |
 |
| Fig.3 Creating a larger hole for the saw |
 |
| Fig.4 left side cut using jigsaw |
 |
| Fig.5 Cutting exterior paneling |
 |
| Fig.6 Opening now ready for A/C |
 |
| Fig.7 Level the unit |
 |
| Fig.8 Placing the pilot screw |
|
| Fig.9 A/C Leveled |
 |
| Fig.10 Caulking exterior bottom of A/C |
 |
| Fig.11 Caulking exterior sides of A/C |
 |
| Fig.12 Exterior side ready for the elements |
 |
| Fig.13 shows the A/C unit ready to use |
How to Install a Portable Air Conditioner:
- Part 1 of 2 - Patio Wall
- Part 2 of 2 - Cut and Install
Update: DIY Advisor has New blogs check them today:
- Handyman Blog: DIY Advisor
- DIY Advisor Sitemap
- Food Blog: From Kiwis To Pistachios
- Food Blog Sitemap
- Tool Blog: DIY Advisor Toolbox
- Tool Blog Sitemap
- Artwork Blog: Light in Dark Artwork
- Artwork Blog Sitemap
- Class-A Tests: DIY Class-A Drivers License Tests
- Class-A Tests Sitemap: Class-A Sitemap
- DIY Poem: DIY Poem Meter Blog
- DIY Poem Sitemap: DIY Sitemap
- Cookie Alert: European Union laws requires that you know that this blog uses cookies. If you are concerned about this please click here to see how Google uses this information.
Note: The DIY Advisor assumes no liability for omissions, errors or the outcome of any jobs. The reader must always exercise reasonable caution, follow current codes and regulations that may apply, and is urged to consult with a licensed contractor if in doubt about any steps on these posts. All names were changed to protect client's privacy. DIY Advisor. Reproduction of site content including photos without permission prohibited. All rights reserved. © Copyright 2011-

No comments:
Post a Comment