Showing posts with label silicone. Show all posts

Friday, August 30, 2013

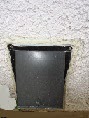
How to Replace Dryer Vent - Part 4 of 4 - Metal Foil Installation

Fig.1 Foil vent
By Gary Boutin

Parts and Supplies:
Phillips screwdriver 
Dryer foil pipe
Razor knife
Silicone
Sheetrock metal screws (also known as drywall screws)

Michael works for a program called Uncommon Good that teaches students about green energy. His home is located in Upland, California, a beautiful neighborhood with mature trees in a rural setting. He had just purchased a century-old home and wanted to preserve its look. Being a principal member of Uncommon Good, he was using the house to teach others how to go green. He called my repair service to hook up his dryer vent. In troubleshooting the job, the dryer vent was missing. The former owners had taken the vent with them.

This post shows the six steps to install the vent in a stucco wall.

Step 1: Fig.1 shows the metal foil is on the the dryer vent pipe but it's not straight. Notice the white insert should be square with the floor. Fig.2 shows another angle of the foil pipe.
Fig.2 Backing still crooked
Step 2: Fig.3 shows the white insert is square with the floor. Also shown is the application of silicone to the edges of the metal dryer pipe.

Fig.3 Applying silicone
Step 3: Fig.4 shows that by California code cloth tape normally called duct tape can not be used any longer. Cloth duct tape can not be used because the adhesive dries out and the tape does not function any more. Using the metal tape does not dry out and the the adhesive qualities are maintained for many years of use. It's not as simple as placing tape on a box.
Fig.4 Metal foil tape
Step 4: Fig.5 shows the metal tape has been used to secure any air leakage into the house, the metal strap holds onto the metal vent pipe and is secured by two metal screws.
Fig.5 Vent strap 
Step 5: Fig.6 shows metal tape is added to the pipe. Michael asked this part to be added to the foil pipe since the foil pipe is very thin and he wanted it to be secured.
Fig.6 Tape over vent strap
Step 6: Fig.7 shows all three pipes are now secured and the laundry room can now be used.
Fig.7 All pipes attached


How To Replace a Dryer Vent:

Update: DIY Advisor has New blogs check them today:

  • Cookie Alert: European Union laws requires that you know that this blog uses cookies. If you are concerned about this please click here to see how Google uses this information.

Note: The DIY Advisor assumes no liability for omissions, errors or the outcome of any jobs. The reader must always exercise reasonable caution, follow current codes and regulations that may apply, and is urged to consult with a licensed contractor if in doubt about any steps on these posts. All names were changed to protect client's privacy. DIY Advisor. Reproduction of site content including photos without permission prohibited. All rights reserved. © Copyright 2011-

How to Replace Dryer Vent - Part 3 of 4 - Dryer Vent Installation

Fig.1 Placing the wall vent
By Gary Boutin

Supplies and Tools:
Bit Holder with Phillips bit
Ryobi 12 Volt Cordless screwdriver
Razor knife
Silicone
Sheetrock metal screws (drywall screws)

Michael works for a program called Uncommon Good that teaches students about green energy. His home is located in Upland, California, a beautiful neighborhood with mature trees in a rural setting. He had just purchased a century-old home and wanted to preserve its look. Being a principal member of Uncommon Good, he was using the house to teach others how to go green. He called my repair service to hook up his dryer vent. In troubleshooting the job, the dryer vent was missing. The former owners had taken the vent with them.

This post shows the seven steps to install the vent in a stucco wall.

Step 1: Fig.1 shows sheetrock metal screws are driven into the stucco.
Step 2: After placing the vent against the wall a gap was showing. Fig.2 shows the gap between the wall and the vent.
Fig.2 New vent
Step 3: Fig.3 shows the solution was to cut off the heads of each blue anchor to remove the gap. The anchor head was not needed to anchor against the stucco wall.
Fig.3 cut off the anchor for vent smooth fitting
Step 4: Fig.4 shows that the vent was replaced on the stucco wall.
Fig.4 Driving in screws into stucco
Step 5: Fig.5 shows that a thick silicone bead that is being pushed into the gap.
Fig.5 Start finger bead
Step 6: Fig.6 shows that the silicone bead was pushed all around the metal vent. Next post shows the installation of the metal foil to the dryer vent.
Fig.6 End finger bead
How to Replace a Dryer Vent:


Update: DIY Advisor has New blogs check them today:

  • Cookie Alert: European Union laws requires that you know that this blog uses cookies. If you are concerned about this please click here to see how Google uses this information.

Note: The DIY Advisor assumes no liability for omissions, errors or the outcome of any jobs. The reader must always exercise reasonable caution, follow current codes and regulations that may apply, and is urged to consult with a licensed contractor if in doubt about any steps on these posts. All names were changed to protect client's privacy. DIY Advisor. Reproduction of site content including photos without permission prohibited. All rights reserved. © Copyright 2011-

How to Replace a Dryer Vent - Part 2 of 4 - Dryer Vent Installation in Stucco

Fig.1 The vent template
By Gary Boutin

Supplies and Tools:
Hammer
Masonry drill bit  
Plastic anchor (Blue)
Ryobi 12 Volt Cordless drill
Silicone


Michael works for a program called Uncommon Good that teaches students about green energy. His home is located in Upland, California, a beautiful neighborhood with mature trees in a rural setting. He had just purchased a century-old home and wanted to preserve its look. Being a principal member of Uncommon Good, he was using the house to teach others how to go green. He called my repair service to hook up his dryer vent. In troubleshooting the job, the dryer vent was missing. The former owners had taken the vent with them.

This post shows the seven steps to install the dryer vent in a stucco wall.

Step 1: Fig.1 shows that he tried to apply silicone to the edges, this was Michael's first attempt at installing the vent. The problem was the vent would not slide into the wall and was sticking out.
Step 2: After finding out that one of the plaster wooden lats had fallen between the hole in the wall, obstructing the vent from fitting into the wall. The lat was pushed out of the way and then the metal dryer vent was fitted into the wall. Fig.2 shows that the vent had pre-drilled holes to secure it into the wall. A cordless drill with a masonry drill bit was used to puncture the stucco wall. This will need to be done four times to get the vent secured. Stucco walls are similar to cement walls and need to be drilled into to make a hole. Punching the stucco with a hammer and metal wedge will damage the wall and the hole that will be made will be unusable.
Fig.2 Vent template
Step 3: Fig.3 shows  the first hole was made. Stucco has no grabbing edges, it's just rock, so an anchor needs to be used. Below the blue anchor will be used to give the metal screw something to hang on to.
Fig.4 Blue plastic anchor

Step 4: Fig.4 shows a claw hammer driving the blue anchor into the wall.
Fig.4 Hammering anchor
Step 5: Fig.5 shows the anchor is in the wall. At this point with the top row completed, now it's time for the bottom row.
Fig.5  Top anchor
Step 6: Fig.6 shows the cordless drill with a masonry drill bit drilling the last two bottom holes.


Fig.6 Last hole
Step 7: Fig.7 shows the claw hammer driving in the last blue anchor into the stucco wall. Next post shows the installation of the vent into the wall.
Fig.7 Bottom row anchor
How to Replace a Dryer Vent:


Update: DIY Advisor has New blogs check them today:

  • Cookie Alert: European Union laws requires that you know that this blog uses cookies. If you are concerned about this please click here to see how Google uses this information.

Note: The DIY Advisor assumes no liability for omissions, errors or the outcome of any jobs. The reader must always exercise reasonable caution, follow current codes and regulations that may apply, and is urged to consult with a licensed contractor if in doubt about any steps on these posts. All names were changed to protect client's privacy. DIY Advisor. Reproduction of site content including photos without permission prohibited. All rights reserved. © Copyright 2011-

Wednesday, June 19, 2013

How to Replace a Dryer Vent Cap

Fig.1 Old vent
By Gary Boutin

Supplies and Tools:
Cordless screwdriver with a Phillip bit 
Dryer metal duct pipe and vent kit
Silicone - clear

Mr. Georgianna had seen my truck in the neighborhood. He left a message on my wiper blade to help him out on a small dryer duct job.

This post shows the seven steps to complete the dryer vent assembly.

Step 1: Fig.1 shows above right is the old dryer vent cover, all bent inside and outside.
Step 2: Fig.2 shows below is the inside view of the vent that will be attached to the dryer exhaust pipe. This one below has little room to attach any pipe extension.

Fig.2 Inside laundry
Step 3: Fig.3 shows the proper vents to use for this job. Unfortunately before calling me to do this job, Mr. Georgianna cut the vent cover from the vent pipe and he still was unable to remove the galvanized piece between the interior wall and the exterior wall. It seemed simple enough but it was more complicated than Mr. Georgianna believed.
Fig.3 Metal coupler
Step 4: Fig.4 shows the completed cover on the exterior wall. All that needs to be done is painted the same color as the wall.
Fig.4 New cover
Step 5: You ask how was it done? The galvanized pipe was held by two sheet rock screws on the top of the pipe. Once remove the wall pipe fell out of the hole. Fig.4 shows the new vent cover/pipe was added to the wall area. Fig.3 on the right side, the wall pipe is much longer than a standard wall size and this length allowed easy installation of foil pipe to the dryer vent. 
Step 6: After the pipe is in the wall use a cordless screwdriver with a Phillip bit to drive the 4-sheet metal screws into the stucco.
Step 7: Read my post "How Do You Open Caulking Tubes" and then apply clear silicone using a manual caulking or a battery operated caulking gun to release the silicone to the entire exterior edge of the dryer vent. When the silicone is added to the interior it will seal any gaps between the metal  vent and the stucco. This wall hole was the perfect size for this pipe, caulking was used on the inside and the outside. Some kits come with a interior flange to hide any gaps in the wall, this is a good to reduce any air leaking out of the home. 
Step 8: The warehouse store that Mr. Georgianna purchased the vent cap/pipe gave him another new one at no charge, customer staff person stated that the piece was defective. This job is finished. 


Update: DIY Advisor has New blogs check them today:

  • Cookie Alert: European Union laws requires that you know that this blog uses cookies. If you are concerned about this please click here to see how Google uses this information.

Note: The DIY Advisor assumes no liability for omissions, errors or the outcome of any jobs. The reader must always exercise reasonable caution, follow current codes and regulations that may apply, and is urged to consult with a licensed contractor if in doubt about any steps on these posts. All names were changed to protect client's privacy. DIY Advisor. Reproduction of site content including photos without permission prohibited. All rights reserved. © Copyright 2011-

Monday, December 31, 2012

How to Paint and Repair Alley Window

Electric Drill
By Gary Boutin

Supplies and Tools:
Electric circular saw 
Electric drill and bits
Flat head screwdriver
Framing hammer
Liquid nails adhesive
Metal 16 gauge nails
Measuring tape
Oil base primer
Oil base brown paint
Paint Brush 4-inch
Fat Measuring Tape
Plywood Oriented Strand Board (OSB) 3/4 inch 
Silver metal paint 
Sheet rock screws
White silicone

Willie had a window in the rear of his cottage that overlooked an alley. He worried about his family safety, nothing had happened but graffiti had just been painted on his window screen. The window was not in use and the window had been replaced with hardboard not near enough security for my friend. He wanted the window and screen frame to be more secured.

This post shows thirteen steps to secure this window.

Step 1: Fig.1 shows a wooden frame with a metal screen.  
Step 2: Fig.2 shows the window looks like from the alley. It has painted over with white graffiti.
Step 3: Fig.3 shows a flat head screwdriver to remove the screen from the window.
Fig.1 Wooden frame
Fig.2 Window
Fig.3 Pry off screen
Step 4: Fig.4 and fig.5 shows removing the dirt with a 4-inch paint brush and dusted all over the window area. The plywood chosen was a 1-3/4-inch Oriented Strand Board (OSB) was used as sub-flooring. The plywood was measured and cut with an electric circular saw.
Step 5: Fig.6 shows the back sides were painted on both sides of the OSB plywood with oil base primer to seal the plywood board.
Fig.4 Paint frame
Fig.5 Dust main window
Fig.6 Oil primer
Step 6: Fig.7 shows Liquid Nails adhesive was applied to the back side of the plywood and inserted the board within the window frame. Sheet rock screws to add additional security to the plywood board.
Step 7: Fig.8 shows painted the front side of the board with the same paint as the back.
Step 8: Fig.9 shows a painted the white plywood window board with two coats of oil Base brown paint.
Fig.7 Liquid nails
Fig.8 Oil primed
Fig.9 Brown paint
Step 9: Fig.10 and fig.11 shows applied white silicone to fill the wooden gaps in the wooden frame and painted the metal screen with silver metal paint, to remove the red painted graffiti.
Step 10: Fig.12 shows prepared each side of the screen by using an electric drill with a bit to created several pilot holes for 16 gauge 4-inch nails on both sides of the screen. The screen is not for protection, it's for camouflage.
Fig.10 Silicone
Fig.11 Edge
Fig.12 Nailed
Step 11: Fig.13 shows the nails that were used to secure the screen to the wood edges.
Step 12: Fig.14 shows painted the screen frame edges brown to match the window. Use the nails as handles and pushed the window screen into place and hammered the nails into place.
Step 13: Fig.15 shows the window frame and the window screen finished.
Fig.13 Nail both edges
Fig.14 Oil painted
Fig.15 Finished


  • Handyman Blog: DIY Advisor
  • Food Blog: From Kiwis To Pistachios
  • Artwork Blog: Light in Dark Artwork
  • Class-A Tests: DIY Class-A Drivers License Tests

    • Cookie Alert: European Union laws requires that you know that this blog uses cookies. If you are concerned about this please click here to see how Google uses this information.

    Note: The DIY Advisor assumes no liability for omissions, errors or the outcome of any jobs. The reader must always exercise reasonable caution, follow current codes and regulations that may apply, and is urged to consult with a licensed contractor if in doubt about any steps on these posts. All names were changed to protect client's privacy. DIY Advisor. Reproduction of site content including photos without permission prohibited. All rights reserved. © Copyright 2011-