Showing posts with label paint brush. Show all posts

Saturday, April 9, 2016

How to Repair Dining Room Ceiling Leak - Part 2 of 2 - Priming and Painting

Fig.1 Painter's cap
By Gary Boutin

Supplies and Tools:
Ladder 6 feet
Paint brush 
Paint can opener (free at The Home Depot)
Paint edger
Painter's hat
Paint roller and paint frame
Paint tray with disposable plastic insert
Painter's tarp
Primer paint (Kilz white)
Rags (pick up paint drips)
Vacuum Cleaner with Drywall bag

Mr. Johnson had called a plumber to repair a leaking copper pipe. The damaged pipe had been leaking for a long time and the entire ceiling was soggy. The local plumber punctured the ceiling just enough to repair the copper tee pipe was replaced and soldered. Mr. Johnson called my repair service to repair and paint his dining room ceiling. The catch was the job had to be done in one day because the family was leaving to New Mexico the next day.

This post shows the seven steps to prime and paint the dining room ceiling.

Step 1: Fig.1 shows a painter's hat.
Step 2: Fig.2 and fig.3 shows more tarps protecting the furniture from paint drops.
Fig.2 Cover everything
Fig.3 Cover lamps
with tarp
Step 3: Fig.4 shows Kilz primer and fig.5 shows that gloves must be worn when sanding joint compound.

Note: Kilz primer was chosen because it dries in 30 minutes.
Fig.4 Kilz 2 primer
Fig.5 Opening the 
Kilz primer
Step 4: Fig.6 and fig.7 shows the ceiling the ceiling was primed and now ready to received the semi-gloss paint.
Fig.6 paint tray 
with wall edger
Fig.7 shows the ceiling 
is flat and ready for texture

Step 5: Fig.8 and fig.9 shows the ceiling being painted with semi-gloss paint. The paint was provided by the customer.
Fig.8 rolling the ceiling
Fig.9 Semi-Gloss paint

Step 6: Fig.10 shows the ceiling is finished and there is no sign of any damage on the ceiling.
Fig.10 Ceiling painted
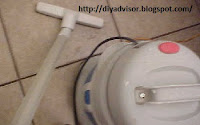
Step 7: Fig.11 shows the last job is to clean up all the dust from the tarps and floor areas using a shop vac vacuum cleaner with floor brush. Now that the job is finished the Johnson family can go on their vacation.
Fig.11 Vacuum cleaner

How To Repair a Dining Room Ceiling Leak:


Update: DIY Advisor has New blogs check them today:

  • Cookie Alert: European Union laws requires that you know that this blog uses cookies. If you are concerned about this please click here to see how Google uses this information.

Note: The DIY Advisor assumes no liability for omissions, errors or the outcome of any jobs. The reader must always exercise reasonable caution, follow current codes and regulations that may apply, and is urged to consult with a licensed contractor if in doubt about any steps on these posts. All names were changed to protect client's privacy. DIY Advisor. Reproduction of site content including photos without permission prohibited. All rights reserved. © Copyright 2011-

Friday, October 23, 2015

How to Repair a Soap Damaged Shelf - Part 6 of 6 - Semi Gloss Paint

Fig.1 Semi Gloss Paint
By Gary Boutin


Tools and supplies:
Paint brush
Paint wood stirrer (free)
Paint gloves
Semi gloss paint 

Our laundry shelf was compromised by leaking laundry soap.  This is the final post were all the repair have come together. Now the shelf is safe from potential liquid detergents. 

This post shows the four steps in repairing this laundry shelf.

Step 1: Fig.1 shows the Semi-Gloss Paint provided by the builders. Fig.2 shows the Home Depot free wood stirrer. This will be used to stir the paint into a consistent fluid

Fig.2 Stir the paint
Step 2: Fig.3 shows the tools must be cleaned and dried for the next use.

Fig.3 Wash the tools
Step 3: Fig.4 shows that the paint cover must be pressed on securely. Fig.5 shows that for a plastic container make sure the lid is on tightly by checking the edges.

Fig.4 Press the cap
Fig.5 Make sure its closed

Step 4: Fig.6 shows the shelf has been painted and the shelf liner has been installed. Fig.7 shows a close up of the bleach in the wall cabinet.

Fig.6 Finished shelf
Fig.7 Close up
How to Repair Soap Damaged Shelf:

Update: DIY Advisor has New blogs check them today:

  • Cookie Alert: European Union laws requires that you know that this blog uses cookies. If you are concerned about this please click here to see how Google uses this information.

Note: The DIY Advisor assumes no liability for omissions, errors or the outcome of any jobs. The reader must always exercise reasonable caution, follow current codes and regulations that may apply, and is urged to consult with a licensed contractor if in doubt about any steps on these posts. All names were changed to protect client's privacy. DIY Advisor. Reproduction of site content including photos without permission prohibited. All rights reserved. © Copyright 2011-

How to Repair Soap Damaged Shelf - Part 4 of 6 - Priming the Shelf

Fig.1 Primer
By Gary Boutin

Tools and Supplies:
Gloves or dish washing gloves
Glidden Gripper White Primer/Sealer paint
Paint brush
Paint can opener
Paint wood stirrer
Towel clean wet and dry

We have lived in our condominium for seven years and the laundry shelf  was damaged from the liquid soap we used in our washing machine. This is a simple repair and these next six post shows how this shelf will be repaired. 

This post shows the seven steps on how this shelf was painted with primer. 

Step 1: Fig.1 shows the Glidden Gripper White Primer/Sealer paint that was used to paint the entire shelf. This paint is good enough to only give one coat of paint. Fig.2 shows that you need to cover your hands,  either use dish washing gloves or disposable gloves.
Fig.2 Gloves
Step 2: Fig.3 shows a free wooden stirrer from the Home Depot paint department. Plus a 1-1/2 inch paint brush that was used to prime the shelf.
Fig.3 Wood stir 
and paint brush
Fig.4 Disposable gloves
Step 3: Fig.5 shows the primer being stirred and ready to paint the damaged shelf. The clean towel was used over the washing machine.
Fig.5 Stir paint
Step 4: Fig.6 shows that the severely damaged area was primed. The entire shelf was painted with primer that was dry in 30 minutes.
Fig.6 Paint shelf

Step 5: Fig.7 now this shelf is primed and ready to be painted with semi-gloss paint. 
Fig.7 Job done
Step 6: Fig.8 shows that after using the painting tools they need to be cleaned and dried for the next use.
Fig.8 Clean tools
Step 7: Fig.9 shows that the tools are drying for the paint job.
Fig.9 Tools drying
How to Repair Soap Damaged Shelf:

Update: DIY Advisor has New blogs check them today:

  • Cookie Alert: European Union laws requires that you know that this blog uses cookies. If you are concerned about this please click here to see how Google uses this information.

Note: The DIY Advisor assumes no liability for omissions, errors or the outcome of any jobs. The reader must always exercise reasonable caution, follow current codes and regulations that may apply, and is urged to consult with a licensed contractor if in doubt about any steps on these posts. All names were changed to protect client's privacy. DIY Advisor. Reproduction of site content including photos without permission prohibited. All rights reserved. © Copyright 2011-

Monday, October 19, 2015

How to Install Plastic Outer Corner Gutter

Fig.1 The job
By Gary Boutin

Tools and Supplies:
Circular saw 5 1/4 inch blade
Caulking gun, Caulking latex
Cordless screwdrivers

Knife flat
BEHR Premium Plus Ultra
Fig.2 Finished 
gutter system
Paint brush
Propane tank with striker
Screws 4-inch
Tape measure
Wood block 2x6 Douglas Fir

Wood glue 

Amerimax Home Products Supplies:  

Traditional Vinyl Gutter 10 ft. Brown
Vinyl K-Style Joiner 10 ft. Brown
Vinyl Hidden Hangar Brown
Outside corner Brown  
Downspout plastic clips Brown 
Drop outlet 2 in. x 3 in. Brown 
Vinyl Gutter gutter silicone - Clear

Mr. Jones had done most of the job of installing Amerimax Home Products vinyl gutters that he purchased from The Home Depot. He had pulled his back on the final corner and was not able to finish the job. He hired my service to finish the work. Fig.1 above shows the work that needs to be done and it's the last corner before the job was finished. Fig.2 shows the work that was done and fig.3 shows a side view that the gutter need to be cut and fitted into the outer corner. But the real problem was Mr. Jones wanted gutter placed on a side of the house that gutters are not placed. His reasoning was that when it rained a sheet of water fell over that side of the roof.

This post shows the seven steps on how the outer corner was installed and how we solved the problem of having two different heights. The roof was not the same heights as the garage roof line. Thus we could not attach them together. A drop outlet was installed on the higher gutter so when the rain water flows off the roof it could be contained inside the vinyl gutter system. 

Step 1: Cutting the gutter to fit the outer corner and fig.4 shows the side of the house that will need to have a gutter placed. 
Fig.3 Side view of 
corners repair
Fig.4 Two different 
roof fascia
Step 2: Fig.5 shows how the gutter ends was cut to fit the new outer corner. Use a hot knife and push the knife through the plastic gutter. 
Fig.5 Hot knife


Step 3: Outside corner installed. Fig.6 shows the outside corner is being adjusted. Fig.7 shows the dry fit of the outside corner into the existing gutter. Fig.8 shows that a tape measure was used to measure the edge to finish the job. After the gutter was cut, insert the outside corner in place and use deck screws to place it against the existing wood fascia. Once the corner is inserted measure the next part of the gutter and install it. Fig.9 shows to use brown plastic joins to secure the ends. Once the piece is correct place use clear silicone inside the corner.
Fig.6 fitting corner 
with joins
Fig.7 Corner being inserted
Fig.8 Last gutter piece 
measured
Fig.9 Corner being 
supported with joiner
Step 4: Wood edge attached to roof fascia. Fig.10 through fig.12 shows the making of an wood support to help hold the gutter system. Fig.11 and fig.12 shows the triangular edge was cut using a circular saw from a 2x6 Douglas Fir and glued to the existing fascia edge. Holes were drilled into the wood support to house four metal 4-inch screws into the edge of the support piece. A cordless screwdriver was used to insert the screws into the support piece.
Fig.10 Measured
Fig.11 Measure triangle
Fig.12 Cut the piece
Step 5: Wood roof edge painted brown. Fig.13 through fig.15 shows the support will be behind the vinyl gutter and thus needed to be painted. Using a paint brush we chose BEHR Premium Plus Ultra to protect the wood piece behind the gutter. The paint doesn't match but it wont be seen behind the gutter.
Fig.13 Prime 
and paint brown
Fig.14 Insert metal screws
Fig.15 Paint the inside too

Step 6: Fig.16 through fig.18 shows the gutter was cut and placed into the downspout. This was not level because it would go over the top of the existing garage gutter. Fig.18 shows the gutter is being measured past the downspout to add additional gutter to the end. Use a cordless drivers to insert screws from the gutter into the wood fascia.
Fig.16
Fig.17
Fig.18
Step 7: Job is done. After a dry fit of all the components all the parts were secured using a caulking gun with clear silicone adhesive. Fig.19 shows the end result. Not perfect but workable. Plus that what the client wanted.
Fig.19 Downspout over 
existing gutter

Update: DIY Advisor has New blogs check them today:

  • Cookie Alert: European Union laws requires that you know that this blog uses cookies. If you are concerned about this please click here to see how Google uses this information.

Note: The DIY Advisor assumes no liability for omissions, errors or the outcome of any jobs. The reader must always exercise reasonable caution, follow current codes and regulations that may apply, and is urged to consult with a licensed contractor if in doubt about any steps on these posts. All names were changed to protect client's privacy. DIY Advisor. Reproduction of site content including photos without permission prohibited. All rights reserved. © Copyright 2011-