 |
| Fig.1 Ford 2005 Lincoln LS automobile |
Supplies and Tools:
Brake console switch - $30
Electrical Star screwdriver (black handle)
Electrical stripper (Yellow handles)
Electrical tape
Pliers standard (Orange handles)
Needlenose pliers
Putty scraper
Vicegrip® pliers
Mrs. Stone drives a Ford 2005 Lincoln LS automobile pictured right top of this page. While at the car wash a worker pushed in the brake console switch inside the interior console. This post shows how to replace this part.
This post shows the ten steps on how to repair 2005 Lincoln LS Brake Console Switch Replacement.
Step 1: Fig.1 shows a Ford 2005 Lincoln LS automobile.
Step 2: Fig.2 shows the tools; Phillip screwdriver, Electrical Stripper, Pliers (standard), Needlenose pliers, Putty Scraper and Vicegrips® Pliers.
 |
| Fig.2 Tools for this job |
 |
| Fig.3 Console cover tray |
 |
| Fig.4 inside console |
 |
| Fig.5 Underneath coffee tray |
 |
| Fig.6 Brake cable |
 |
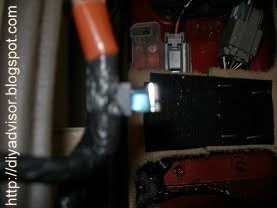
| Fig.7 Wire junction |
Note: Remember how electrical junction was removed because the new switch will need to be put back on.
 |
| Fig.8 Tape removed |
 |
| Fig.9 New brake light switch |
 |
| Fig.10 New switch and cable installed |
 |
| Fig.11 Tap both sides of console lid |
 |
| Fig.12 Pushing lid in place |
- Triple S Customs - Lincoln LS 2000-2006 Vehicle Wiring
- 2005 Lincoln LS - Consumer Reviews
- Double DIN Installation Procedure w/front factory tweeters
- How does one remove the center console?
- Lincoln LS From Wikipedia, the free encyclopedia
- 2005 Lincoln LS Manual
- Lincoln LS
Update: DIY Advisor has New blogs check them today:
- Handyman Blog: DIY Advisor
- DIY Advisor Sitemap
- Food Blog: From Kiwis To Pistachios
- Food Blog Sitemap
- Tool Blog: DIY Advisor Toolbox
- Tool Blog Sitemap
- Artwork Blog: Light in Dark Artwork
- Artwork Blog Sitemap
- Class-A Tests: DIY Class-A Drivers License Tests
- Class-A Tests Sitemap: Class-A Sitemap
- DIY Poem: DIY Poem Meter Blog
- DIY Poem Sitemap: DIY Sitemap
- Cookie Alert: European Union laws requires that you know that this blog uses cookies. If you are concerned about this please click here to see how Google uses this information.
Note: The DIY Advisor assumes no liability for omissions, errors or the outcome of any jobs. The reader must always exercise reasonable caution, follow current codes and regulations that may apply, and is urged to consult with a licensed contractor if in doubt about any steps on these posts. All names were changed to protect client's privacy. DIY Advisor. Reproduction of site content including photos without permission prohibited. All rights reserved.
© Copyright 2011

No comments:
Post a Comment