Measuring tape
Notched trowel
Grout 1-lb
Grout float plastic
Grout sealer
Spacers
Sponge
Silicone
Thin-set mortar (for floor tile)
Tile (Limestone) meshed 12 by 12
Tile saw electric
Towels clean
Utility knife
This job is located in the City of Pomona, a multilevel condominium in a beautiful rural setting with mature oak trees and a well established community. This job was accomplished with the help of my friend Carl.
This post shows the eight steps on how to install 12 inch by 12 inch limestone meshed tile.
Step 1: Above fig.1 shows the tiler must wear heavy leather gloves, limestone tile is very pretty but the edges are very sharp until the tile has been grouted. If you do not like having cuts on your hands or knees then wear gloves and knee pads.
Step 2: Fig.2 shows the job, measured the entire room and find out the dimension of the room. During the measurement we found the back wall was not squared.
Step 3: Fig.3 shows the starting point was the left corner of the bathroom. The back wall was not squared but eventually furniture would cover most of that wall. The entire bathroom is now completely tiled and ready for grouting.
Step 4: Fig.4 shows the room covered with tile. The next day we prepared the floor to apply white sanded grout. Applied grout using a grout float.
Step 5: Fig.5 shows the thin-set mortar on the backerboard, using a notched trowel. I allowed myself an area of two tiles at a time, when I
had enough space ahead. Carl handed me the next tiles to lay on the
floor. Then, I started placing the tile over the thin-set and aligning
them using spacers between each tile.
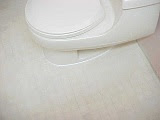
Step 6: Fig.6 shows that the toilet is caulked at the floor level around the base.
Step 7: Fig.7 shows shows the handyman tuning the toilet for next use.
Step 8: Fig.8 shows the bathroom is finished.
 |
| Fig.2 Measure the room |
 |
| Fig.3 Thin-set and new limestone tile |
 |
| Fig.4 Grouted Limestone |
 |
| Fig.5 New Toilet |
 |
| Fig.6 Caulking around toilet |
 |
| Fig.7 Placing bowl top |
 |
| Fig.8 Job finished |
Bathroom Limestone Tiling:
- Part 1 of 3 - Vinyl Floor Removed and Sub Floor
- Part 2 of 3 - Durock® Cement Board Installation
- Part 3 of 3 - Limestone Tiled and Finishing
Handyman Blog: DIY Advisor Food Blog: From Kiwis To Pistachios Artwork Blog: Light in Dark Artwork Class-A Tests: DIY Class-A Drivers License Tests
- Cookie Alert: European Union laws requires that you know that this blog uses cookies. If you are concerned about this please click here to see how Google uses this information.
Note: The DIY Advisor assumes no liability for omissions, errors or the outcome of any jobs. The reader must always exercise reasonable caution, follow current codes and regulations that may apply, and is urged to consult with a licensed contractor if in doubt about any steps on these posts. All names were changed to protect client's privacy. DIY Advisor. Reproduction of site content including photos without permission prohibited. All rights reserved. © Copyright 2011-


No comments:
Post a Comment