 |
| Fig.1 Directions |
Supplies and Tools:
Hanging shelf kit
How do you install a hanging shelf?
This post show the seven steps on how to install a closet hanging shelf.
Step 1: Fig.1 shows a look at the directions. No tools are required to assemble this type of hanging shelf, just follow the easy directions below.
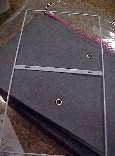
Step 2: Fig.2 shows parts of the hanging closet, notice the metal handle for the hanging self.
 |
| Fig.2 Hooks |
 |
| Fig.3 Frame |
 |
| Fig.4 External |
 |
| Fig.5 Pole hanger |
 |
| Fig.6 Thread pole hanger |
 |
| Fig.7 Job finished closet organizer |
DIY Advisor Blogs:Handyman Blog: DIY Advisor Food Blog: From Kiwis To Pistachios Artwork Blog: Light in Dark Artwork Class-A Tests: DIY Class-A Drivers License Tests
- Cookie Alert: European Union laws requires that you know that this blog uses cookies. If you are concerned about this please click here to see how Google uses this information.
Note: The DIY Advisor assumes no liability for omissions, errors or the outcome of any jobs. The reader must always exercise reasonable caution, follow current codes and regulations that may apply, and is urged to consult with a licensed contractor if in doubt about any steps on these posts. All names were changed to protect client's privacy. DIY Advisor. Reproduction of site content including photos without permission prohibited. All rights reserved. © Copyright 2011-

No comments:
Post a Comment