|
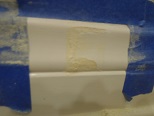
| Fig.1 Wall measurement |
Supplies and Tools:
Air compressor
Brads
Brad nailer
Compound miter saw
Compressor hose 25-foot
MDF molding (Medium Density Fiberboard)
Pencil mark
Tape measure
Mrs. Dee wanted to upgrade her bedroom wall fixed, new baseboards needed to be replaced and her new tenet would arrive in three days.
This post the six steps to finishing the installing of the MDF molding into the bedroom/office.
Step 1: Fig.1 shows the wall being measured. This is the window wall, it has one piece of molding in the middle and missing both ends. Below this end is on the left side near the A/C vent. One side of the molding will be at zero degrees and the other side will be at 45 degrees. The existing molding had to be removed and cut twice on each side to match the new MDF (Medium Density Fiberboard) molding.
Step 2: Fig.2 shows a compound saw cutting the first 45 degree cut to match the new molding on the right side of the room.
 |
| Fig.2 Compound saw |
 |
| Fig.3 Second molding cut |
 |
| Fig.4 Molding settled |
 |
| Fig.5 Nailing the seams |
 |
| Fig.6 Brad nailer |
How to Paint a Garage Bedroom:
- Part 1 of 19 - Room Dimensions
- Part 2 of 19 - Paint - Window Wall Shelf Removed
- Part 3 of 19 - Move Data and TV Cables
- Part 4 of 18 - Cable - Attaching Data and TV Cables
- Part 5 of 19 - Cable - Fixing the Wall
- Part 6 of 19 - Paint - Wall Damages
- Part 7 of 19 - Paint - Repairing Damages
- Part 8 of 19 - Paint - Mixing Paint
- Part 9 of 19 - Paint - Tape and Tarps
- Part 10 of 19 - Paint - Cutting the Walls
- Part 11 of 19 - Paint - Rolling Walls
- Part 12 of 19 - Molding - The Tools
- Part 13 of 19 - Molding - Installing New Baseboards-1
- Part 14 of 19 - Molding - Cut to size and Nail To Wall-1
- Part 15 of 19 - Molding - Cut to size and Nail To Wall-2
- Part 16 of 19 - Molding - Baseboard Caulking
- Part 17 of 19 - Molding - Painting Baseboard Moldings
- Part 18 of 19 - Paint - Cleanup
- Part 19 of 19 - Paint - Room Order
Update: DIY Advisor has New blogs check them today:
- Handyman Blog: DIY Advisor
- DIY Advisor Sitemap
- Food Blog: From Kiwis To Pistachios
- Food Blog Sitemap
- Tool Blog: DIY Advisor Toolbox
- Tool Blog Sitemap
- Artwork Blog: Light in Dark Artwork
- Artwork Blog Sitemap
- Class-A Tests: DIY Class-A Drivers License Tests
- Class-A Tests Sitemap: Class-A Sitemap
- DIY Poem: DIY Poem Meter Blog
- DIY Poem Sitemap: DIY Sitemap
- Cookie Alert: European Union laws requires that you know that this blog uses cookies. If you are concerned about this please click here to see how Google uses this information.
Note: The DIY Advisor assumes no liability for omissions, errors or the outcome of any jobs. The reader must always exercise reasonable caution, follow current codes and regulations that may apply, and is urged to consult with a licensed contractor if in doubt about any steps on these posts. All names were changed to protect client's privacy. DIY Advisor. Reproduction of site content including photos without permission prohibited. All rights reserved. © Copyright 2011-