 |
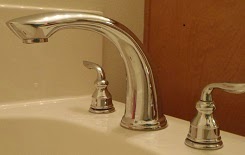
| Fig.1 Front view |
Supplies and Tools:
Clear container
CLR® calcium lime and rust remover
Harbor Freight® slip-joint pliers
Toothbrush
Mrs. Handy lived in a recently new complex in Fontana, California. The condominium complex was only four year old and she was surprised when she noticed white specks coming out of all the tub faucet. Mrs. Handy wanted the faucet aerator cleaned like the sink faucets.
This post shows the eleven steps on maintaining a tub aerator.
Step 1: Drinking water can contain many minerals and other hazardous substances. Arrow Head® the leading bottled water has the mineral content of some of Calcium, Sodium, Potassium, Fluoride, Magnesium, Bicarbonate, Nitrate, Chloride, Copper, pH (units) Sulfate, Arsenic, Lead. The only way to remove harmful mineral is to use a filter. If you are interested in more information please click on the US EPA web site.
Step 2: Fig.1 shows the faucet before the repairs.
Step 3: Fig.2 shows the tub aerator and brass nut that had mineral deposit around it.
 |
| Fig.2 Tub aerator not cleaned |
 |
| Harbor Freight® Slip-Joint Pliers |
 |
| Harbor Freight® Vice Like Grip |
 |
| Fig.3 Faucet with no aerator |
 |
| Fig.4 Aerator faucet ring |
 |
| Fig.5 Side view of aerator faucet ring |
Step 9: After the parts of free of minerals deposits return both parts to the tub faucet. First insert the plastic insert into the brass ring. Take the brass ring and place it back into the faucet. Fig.6 and fig.7 shows the process of returning the tub faucet aerator back onto the faucet
 |
| Fig.6 Tub aerator placed together |
 |
| Fig.7 Tub aerator screwed on the faucet |
 |
| Fig.8 Good water flow |
 |
| Fig.9 Ready to use! |
Update: DIY Advisor has New blogs check them today:
- Handyman Blog: DIY Advisor
- DIY Advisor Sitemap
- Food Blog: From Kiwis To Pistachios!
- Food Blog Sitemap
- Tool Blog: DIY Advisor Toolbox
- Tool Blog Sitemap
- Artwork Blog: Light in Dark Artwork
- Artwork Blog Sitemap
- Class-A Tests: DIY Class-A Drivers License Tests
- Class-A Tests Sitemap: Class-A Sitemap
- DIY Poem: DIY Poem Meter Blog
- DIY Poem Sitemap: DIY Sitemap
- Cookie Alert: European Union laws requires that you know that this blog uses cookies. If you are concerned about this please click here to see how Google uses this information.
Note: The DIY Advisor assumes no liability for omissions, errors or the outcome of any jobs. The reader must always exercise reasonable caution, follow current codes and regulations that may apply, and is urged to consult with a licensed contractor if in doubt about any steps on these posts. All names were changed to protect client's privacy. DIY Advisor. Reproduction of site content including photos without permission prohibited. All rights reserved. © Copyright 2011-

No comments:
Post a Comment