 |
| Slot screwdriver |
Supplies and Tools:
Air Gap Black PVC Disposer Hose (Watts)
Dishwasher Hose (new)
Flashlight or portable light
Measuring tape
Nut driver or Hex Socket (for hose clamps)
Stainless Steel Hose Clamps (Worm Drive)
Screwdriver Slot
Scissors
Shallow Pan (for drips)
Vacuum Cleaner
Janet a former customer who lives at Inland Empire Apartments needed a simple job done in her newly designed kitchen. The apartment came with all new appliances before she moved into her unit. She had looked at the air gap and noticed that it was not operational and had been told by a local plumber that the air gap should be in use for her new dishwasher to work correctly. She had called the service desk several time and tried to get a date when the job could be done but she was unable to placed work order for an immediate assignment. Upon arrival the handyman noticed the air gap was placed on the new granite counter top but was not attached to either the dishwasher or the garbage disposal. The dishwasher hose was installed on the garbage disposal unit so it could drain. A new hose would need to be installed onto the air gap and also attached the dishwasher hose to the garbage disposal. Janet had purchased the Watt hose below. She neglected to purchase the hose clamps that would secure the rubber hose to the air gap. She had a new Maytag manual that shows a complete installation of how the unit needed to be installed. For more information, please click on Maytag link above.
The main part for this job is the Watt Air Gap Hose obtained from The Home Depot web page. "This utility hose is designed with PVC compounds and reinforced with polyester braiding. The braiding offers better fitting retention and less chance of blow off than non-braided styles. It is designed for use as a washing machine or dishwasher inlet and drain hose." If more specification is needed, please click on The Home Depot link above.
This post shows the seven steps used to install a rubber hose onto an air gap.
Step 1: Obtain the parts for the job. Fig.1 shows a Watts Black PVC Disposer Hose 7/8 in. x 2 ft. made in Mexico.
 |
| Fig.1 Air gap hose |
 |
| Fig.2 Pictograph directions |
 |
| Fig.3 Written directions |
 |
| Fig.4 Tools |
 |
| Fig.6 Worn hose clamp |
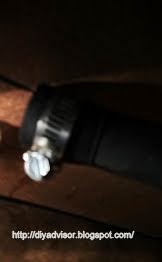 |
| Fig.6 Discharge inlet |
 |
| Fig.7 Air gap hose finished |
Update: DIY Advisor has New blogs check them today:
- Handyman Blog: DIY Advisor
- DIY Advisor Sitemap
- Food Blog: From Kiwis To Pistachios
- Food Blog Sitemap
- Tool Blog: DIY Advisor Toolbox
- Tool Blog Sitemap
- Artwork Blog: Light in Dark Artwork
- Artwork Blog Sitemap
- Class-A Tests: DIY Class-A Drivers License Tests
- Class-A Tests Sitemap: Class-A Sitemap
- DIY Poem: DIY Poem Meter Blog
- DIY Poem Sitemap: DIY Sitemap
- Cookie Alert: European Union laws requires that you know that this blog uses cookies. If you are concerned about this please click here to see how Google uses this information.
Note: The DIY Advisor assumes no liability for omissions, errors or the outcome of any jobs. The reader must always exercise reasonable caution, follow current codes and regulations that may apply, and is urged to consult with a licensed contractor if in doubt about any steps on these posts. All names were changed to protect client's privacy. DIY Advisor. Reproduction of site content including photos without permission prohibited. All rights reserved. © Copyright 2011-

No comments:
Post a Comment