Showing posts with label paper mask. Show all posts

Monday, February 23, 2015

How to Seal Red Brick

Fig.1 Red brick damage
By Gary Boutin 

Supplies and Tools: 
Brush paint 2-1/2 in.
Bug spray 1.5 gallon
Caulking gun
Jasco® brick sealer
Mortar repair caulking tube
Safety gear: Glasses, rubber gloves, paper mask
White vinegar


Mr. Suez along his kitchen nook had only one section of backyard brick wall that needed to be repaired. He wanted a quick fix because he had sold the house. It appeared that two of his sprinklers were facing the bricks. The middle bricks had started to deteriorate. Part of the repair was to insert new repair patch within the brick wall and the other part was to apply a sealer coat to the brick area.   

This post shows the six steps to repair this problem. 

Step 1: Fig.1 shows the removal of all debris, plant and garbage near the wall area. Scrape out loose bricks and loose mortar.
Step 2: Fig.2 shows a manual caulking gun that will be used to apply missing mortar on the seams of the brick wall. Fig.3 shows a 2-inch brush that will be used to cut around the red brick area.
Fig.2 Caulking gun
Fig.3 Brush 2-inch
Step 3: Apply to the entire area. This area is 3 foot high by 4 foot wide. Fig.4 and fig.5 shows the  Jasco® sealer below for the best result of red bricks. Click here to learn more abut Jasco sealer.
Fig.4 Jasco Cure-Seal
Fig.5 Jasco Cures all
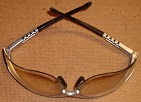
Step 4. Fig.6 shows the white vinegar to remove any stains on the red brick then let dry. Fig.7 through fig.9 shows the safety equipment should include gloves for the hands, fig.8 shows a mask for the odor, and glasses for protect the eyes.
Fig.6 White Vinegar
Fig.7 Gloves
Fig.8 Mask
Fig.9 Eye protection
Step 5: Fig.10 and fig.11 shows the use of a bug sprayer to spray the sealer on the brick. If by chance the trim is sprayed it will not damage the wood. 
Fig.10 Vinegar spray
Fig.11 Spray sealer
Step 6. Watch U-tube to see how easy it is to apply brick sealer.

Update: DIY Advisor has New blogs check them today:
  • Cookie Alert: European Union laws requires that you know that this blog uses cookies. If you are concerned about this please click here to see how Google uses this information.

Note: The DIY Advisor assumes no liability for omissions, errors or the outcome of any jobs. The reader must always exercise reasonable caution, follow current codes and regulations that may apply, and is urged to consult with a licensed contractor if in doubt about any steps on these posts. All names were changed to protect client's privacy. DIY Advisor. Reproduction of site content including photos without permission prohibited. All rights reserved. © Copyright 2011-

Friday, June 21, 2013

How to Repair a Front Door that has Been Invaded by a Sparrow Flock - Part 2 of 2 - Bird Mesh

Fig.1 Handyman 
folding ladder
By Gary Boutin

Supplies and Tools:
Dust broom and dust pan
Extension ladder
Hardware cloth or chicken wire
Paper mask
Latex gloves
Plastic trash bags
Roof nails - galvanized
Rubber shoes or boots
Primer

Mrs. Down lives in Eastvale, California. She had been attacked twice by killer sparrows on the front of her home. She needed a pest control company but the companies that came to her house wanted a thousand of dollars to apply the bird spikes. She called my services to solve the problem.

This post shows the eight steps to removing killer sparrows off of Mrs. Down property.

According to About.com sparrows can be found on every continent except Antarctica. Sparrows are common in North and South America and belong to the family Emberizidae. There are dozens of sparrow species in this family, all with subtle differences in appearance, habitat and range. Some songbirds were less popular than the swallow and a few were considered outright pests, the ubiquitous house sparrow among them. Its hieroglyph, sparrow, translit. qsn. qsn.w–which may have referred to other small songbirds as well–was used as a determinative in words denoting "badness".

 swallow
wr-(ur)--(bil.)

Step 1: Above shows the nest. Most nest are located in the eves of the house. The ladder is erected to the second floor garage roof eaves. The primary nest was located here. 
Step 2: Fig.2 shows the twigs, feathers and dirt that needs to be removed from the eaves. Fig.3 shows a close up view of the sparrows nest.
Fig.2 The nest
Fig.3 House bird nest
Step 3: Fig.4 and fig.5 shows the handyman removes the sparrow's bird nest from the eave. This is an extremely smelly job and latex gloves and mask should be worn. Use a broom with a small handle to rake the next out of the eave area. Bring some Plastic Trash Bags to the roof edge to dispose of the sparrows nest.
Fig.4 Gary 
on the roof
Fig.5 Gary 
positioning 
hardware cloth
Step 4: Fig.6 shows the Handyman unrolling chicken wire to prevent the sparrows from nesting in the eaves. Fig.7 shows the application of hardware cloth that also prevents sparrows from returning to  the eaves.
Fig.6 Gay showing 
with hardware cloth
Fig.7 Area cleaned and 
protected from local birds
There are many ways to removed these birds, the best is the "bird spike" but many home association will not allow these spikes in view. It's important to check your home association to make sure that these deterrents can be used on your home. For this job spikes could not be used, but the association allowed chicken wire or hardware cloth. Now Mrs. Down is living the dream without sparrows nesting in her dream home.


How to Repair a Front Door that has Been Invaded by a Sparrow Flock:


Update: DIY Advisor has New blogs check them today:

  • Cookie Alert: European Union laws requires that you know that this blog uses cookies. If you are concerned about this please click here to see how Google uses this information.

Note: The DIY Advisor assumes no liability for omissions, errors or the outcome of any jobs. The reader must always exercise reasonable caution, follow current codes and regulations that may apply, and is urged to consult with a licensed contractor if in doubt about any steps on these posts. All names were changed to protect client's privacy. DIY Advisor. Reproduction of site content including photos without permission prohibited. All rights reserved. © Copyright 2011-