Showing posts with label Tape. Show all posts

Wednesday, August 17, 2016

How to Repair a Bissell® 801004 Carpet Cleaner - Part 7 of 9 - Flow Base Fit and Elevator Lever Arm and Hood Repair

Bissell® 8010 
Carpet Cleaner
By Gary Boutin


Tools and Supplies:
Anvil or Flat Bench Surface
Electrical Tape 
Plumber's Tape (metal)
Screwdriver Flat Tip
Titebond® Super Gel Glue

This post shows the sixteen steps on fitting the Flow Base, repairing the Elevator Lever Arm and applying adhesive on ther Bissell® Hood Main Housing. 


1
The first step is to dry fit the parts of the Bissell® Flow Indicator Base. Here the brass sleeve can be seen inside the Bissell® Flow Indicator Base. 
2 Next the Bissell® Flow Indicator White Filter is placed into the Bissell® base.
3 Now the Bissell® Flow Red Indicator is placed into the Bissell® Indicator Base and the Bissell® Flow Indicator Base cap is placed on the Bissell® base. Note:  Remember to remove the flow parts prior to installing the Bissell® Hood.
4
Here electrical tape was wrapped around the Bissell® Flow Indicator Base to keep the new part from moving from the top of the motor mount.
5

On the right side of this picture is the right Bissell® Elevator Lever Arm. This part was not in its correct location and had popped itself out of its molded snaps.
6

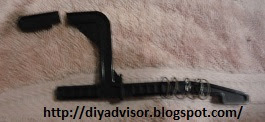
The black arrow shows were the Bissell® Elevator Lever Arm are located on both sides of vacuum.
7
Here shows the broken Bissell® Elevator Lever Arm.
8
This picture shows the use of Titebond® Super Gel adhesive to repair this Bissell® Elevator Lever Arm.
9
Once the Bissell® Elevator Lever Arm is repaired it is snapped into place by using a flat tipped screwdriver.
10
Next, the Bissell® Hood Main Housing needs repair  by applying adhesive were the Bissell® #8 x 3/4" screw hold the down on the Bissell® Base Assembly.

11

This is the opposite side of the repair were the Bissell® Hood Main Housing is secured. Notice the hole is secured to the housing.
12

This picture shows that the repair was done. The bottom piece had Titebond® Super Gel adhesive placed on it and now it part of the Bissell® Hood Main Housing again.
13
A metal back was made using plumber's tape with a large enough hole to give the hood more strength. The plumber's tape was fitted underneath the area and Titebond® Super Gel adhesive was applied to the Bissell® Hood Housing
14
This metal piece made of plumber's tape shows the metal structure.
15


This picture shows the metal back was installed.
16

This picture shows the top of the repaired mounting hole ready to be assembled.


How To Repair a Bissell 801004 Carpet Cleaner:

Update: DIY Advisor has New blogs check them today:

  • Cookie Alert: European Union laws requires that you know that this blog uses cookies. If you are concerned about this please click here to see how Google uses this information.

Note: The DIY Advisor assumes no liability for omissions, errors or the outcome of any jobs. The reader must always exercise reasonable caution, follow current codes and regulations that may apply, and is urged to consult with a licensed contractor if in doubt about any steps on these posts. All names were changed to protect client's privacy. DIY Advisor. Reproduction of site content including photos without permission prohibited. All rights reserved. © Copyright 2011-

Tuesday, August 16, 2016

How to Repair a Bissell® 801004 Carpet Cleaner - Part 6 of 9 - Gluing and Attaching Brass Sleeve

Bissell® 8010 
Carpet Cleaner
By Gary Boutin


Tools and Supplies:
Anvil or Flat Bench Surface
Electrical Tape 
Needlenose Pliers
Screwdriver Flat Tip
Titebond® Super Gel Glue 

This post shows the six steps of applying adhesive on Bissell® Flow Base and attaching the brass sleeve to the clear vinyl tubes. 

1
This picture shows the anvil which the flat surface. The Bissell® Base Flow Indicator Base and the brass compression sleeve. On the right is the Titebond® Super Gel Glue adhesive.
2
Next, apply the Titebond® Super Gel Glue adhesive to the inside of the Bissell® Flow Indicator Base and insert the brass compression sleeve. Use a Flat Tipped Screwdriver to hold on the top of the brass compression sleeve. The tip must be held a minimum 15-seconds.
3
The Bissell® Clear Vinyl Tube on the right is the new repair and will be inserted on the brass sleeve. The one on the left will be inserted on its plastic nipple.
4
Use Needlenose Pliers to press the Bissell Clamps® open and push over the end of the tube. Check to make sure both Bissell Clamps are in the correct location on the Bissell Flow Indicator Base.
5
Here is a side view of the repairs. Notice the Bissel Clamps® are at the top of the hoses.
6
The Bissell® Tube Clear Vinyl hoses were kinked at the bottom of the Black Bissell® Hood Main Housing motor housing. Wrapping electrical tape around the top  of the Bissell® Hood Main Housing will keep the hoses in place. Next two repairs will be the Right Elevator Lever Arm and Bissell® Hood Main Housing.


How To Repair a Bissell 801004 Carpet Cleaner:


Update: DIY Advisor has New blogs check them today:

  • Cookie Alert: European Union laws requires that you know that this blog uses cookies. If you are concerned about this please click here to see how Google uses this information.

Note: The DIY Advisor assumes no liability for omissions, errors or the outcome of any jobs. The reader must always exercise reasonable caution, follow current codes and regulations that may apply, and is urged to consult with a licensed contractor if in doubt about any steps on these posts. All names were changed to protect client's privacy. DIY Advisor. Reproduction of site content including photos without permission prohibited. All rights reserved. © Copyright 2011-

Saturday, January 10, 2015

How to Use Wall Frog What are they and How to use them!

Fig.1 Frog Outline
By Gary Boutin

Supplies and Tools:
Carpentry pencil
Cordless Screwdriver with Phillip -head tip
Drywall piece
Drywall saw
Drywall screws
Drywall T-Square 
Drywall fiberglass tape or paper tape
Dust mask
Mud knife
Mud Pan 
Joint compound
Sander by-hand
Sanding screens
Texture spray
Utility knife
Wet-sand sponge or Sanding screens

Wall-board wall frogs (also called Drywall repair clips®, Insta-back®)

If you ever had to repair a small wall damage than wall frog are for you. If you have to replace large piece of drywall and there was no wood or metal stud near by than the solution is wall frog.

This post shows the eighteen steps to simple install wall frogs and make repair the easiest ever.

Step 1:  Fig.1 shows the frog that can be painted with crayons. Click above right on the frog outline to see more outline that can be shared with the entire family.
Step 2:  Fig.2 shows drywall knives that are used to float the joint compound on a damaged wall.
Fig.2 Drywall knives
Step 3: Fig.3 shows that a purchase at The Home Depot will accomplish the material supply listed above. All of Wall-board Tools can be purchased at The Home Depot. 
Step 4: Fig.4 shows the Wal-Board Tools - Drywall Repair Clips® also called wall frogs. These clips will work on both 1/2 inch and 5/8 inch wallboard.
Fig.4 Drywall  
repair clips®
Step 5: Next, purchase all the supplies for the job needed, see list above. 
The Home Depot Drywall area will have the following supplies that will be needed. Ask any Associate in Building / Construction area and they will gladly help you choose the supplies for this job.

Tools: One of the most important tools is the Drywall T-Square
. The drywall T-square is heat-treated aluminum construction and aircraft alloy steel rivets for strength and durability. This is the best tool because not only does it help you cut the exact piece of drywall it is strong enough hold for cutting 4-foot wide pieces. The information was obtained from The Home Depot Internet site.

Step 6: Fig.5 and fig.6 are examples of damaged holes in walls. 
Fig.5 Wall scraped
Fig.6 Hole
Step 7: Use a carpenter pencil, use the pencil to draw the square around the damaged hole in the wall. Any pencil will do, but carpenter pencil are flat and can lay a fat line to help cut the wall.
Tip: Do not use a #3 pencil the tip is to hard and the line left can barely seen.
Step 8: Fig.7 shows a yellow framing square for the pencil mark to follow. 
Fig.7 Framing square
Step 9: Fig.8 shows the drywall Saw that will be used to cut a square pattern in your wall. As you cut the wall, feel with the other hand in the wall and try not to cut any electrical wires. Work the blade away from the wire if you have some, try to cut a straight line. If it is not possible because of the electrical wire increase the size of the square.
Fig.8 Drywall saw
Step 10: Now remove 4-clips from the packaging. The clip has arms place the clip over the cut wallboard. 


Step 11: Fig.9 shows the wall frog has been attached to the wall. The sheetrock screw is attached to the drywall and the clip.
Fig.9 Wall Frog
Step 12: Fig.10 shows a square piece of drywall to place over the hole. This picture also shows one bracket and drywall screw has been inserted into the wall below right before placing the new drywall piece in place. Presently all the wall frogs are in place waiting for the new drywall piece to be applied. Later wall tape, joint compound and texture will be applied to the wall. Fig.11 shows that after the drywall piece is placed into the wall, the only step left is to wiggle the leg back and forth until it falls off.
Fig.10 Replacement drywall
Fig.11 Left corner
Step 13: Fig.12 shows the drywall paper tape that will be used on this job. Fig.13 shows what drywall fiberglass tape looks like. Fiberglass tape has built in adhesive to secure itself to the wall. The tape is used to re-enforce the new drywall patch.  
Fig.12 Drywall paper tape

Fig.13 Fiberglass tape
Step 14: Fig.14 shows the joint compound that will be placed over the drywall tape. Fig.15 shows  a 5-gal container of joint compound that will be placed on the wall seam before the drywall paper tape is applied. 
Fig.14 Joint compound
Fig.15 - 5-gallon joint compound
Step 15: Fig.16 shows the three types of drywall knifes (look like scrapers) that will be used to apply the joint compound over the drywall tape on the wall. Fig.17 shows that this is the correct knife to get a smooth patch over the tape. No need to overwork it because the patch will need several more coats of joint compound between application to be flushed with the wall.
Fig.16 Drywall knives

Fig.17 Middle wall knife
Step 16: Fig.18 shows the application of the paper drywall tape.
Fig.18 Drywall tape
Step 17: Fig.19 and fig.20 shows that after several layer has been placed on the wall the area needs to be sanded. Instead of sanding the joint compound with black sanding paper, or sanding screens, use a sanding sponge. Sanding sponge is designed for sanding wallboard joint compound. This sponge is dustless sanding, just rinse and reuse. Yellow side cleans and smooths, and white side is used for more aggressive sanding.
Fig.19 Sanding sponge
Fig.20
Note: The information about sanding sponge was obtained from The Home Depot Internet site.

Step 18: Once the wall is smooth then it's time to apply texture. Texture comes in two possible patterns; Knock Down or Orange peel. Look at your wall and if you have any flat areas then the wall is Knock-down. Fig.21 shows Orange peel texture. If the wall resemble an orange peel than its Orange peel texture.  

Note: Check out my site on how to apply orange peel texture.
Fig.21 Orange
Peel Texture
Now that you have seen how wall frogs are used in wall damage repair, consider using them for all your wall damages. Almost all the large warehouse stores carry them and these clips can also be purchase in bulk on the Internet.

Note: Fig.9 and Fig.11 shows pictures taken of drywall repair clips® located at Ganahl Lumber. Ganahl Lumber had a demonstration of the use of these drywall repair clips®. 


Update: DIY Advisor has New blogs check them today:
  • Cookie Alert: European Union laws requires that you know that this blog uses cookies. If you are concerned about this please click here to see how Google uses this information.

Note: The DIY Advisor assumes no liability for omissions, errors or the outcome of any jobs. The reader must always exercise reasonable caution, follow current codes and regulations that may apply, and is urged to consult with a licensed contractor if in doubt about any steps on these posts. All names were changed to protect client's privacy. DIY Advisor. Reproduction of site content including photos without permission prohibited. All rights reserved. © Copyright 2011-