Sunday, December 30, 2012

How to Quick Fix Patio Water Hose

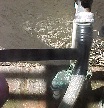
Fig.1 Major
leak
By Gary Boutin 

Supplies and Tools:
Electrical tape

This is a temporary repair and my customer did not want the replace the water hose.

This post shows the four steps on how to quick fix a water hose. 

Step 1: Above right, fig.1 and fig.2 below shows the water hose has a major leak, notice the water spray coming out of the hose.
Fig.2 Leak at hose bib
Step 2: Fig.3 shows the first layer of plastic electrical tape is being applied.
Fig.3 Applying electrical tape
Step 3: Fig.4 and fig.5 shows several more layers of electrical tape.
Fig.4 More layers
Fig.5 Final layers
Step 4: Fig.6 shows the final fix, which cost less than $2 of tape.
Fig.6 Temporary repair job


DIY Advisor Blogs:
  • Handyman Blog: DIY Advisor
  • Food Blog: From Kiwis To Pistachios
  • Artwork Blog: Light in Dark Artwork
  • Class-A Tests: DIY Class-A Drivers License Tests

    • Cookie Alert: European Union laws requires that you know that this blog uses cookies. If you are concerned about this please click here to see how Google uses this information.

    Note: The DIY Advisor assumes no liability for omissions, errors or the outcome of any jobs. The reader must always exercise reasonable caution, follow current codes and regulations that may apply, and is urged to consult with a licensed contractor if in doubt about any steps on these posts. All names were changed to protect client's privacy. DIY Advisor. Reproduction of site content including photos without permission prohibited. All rights reserved. © Copyright 2011-

    How to Use Straight Line Secret

    Nitrile Gloves
    By Gary Boutin

    Supplies and Tools:
    Disposable gloves
    Mask
    Masking tape blue 1-1/2
    Newspaper or tarps
    Paint brush or sponge brush 1-inch
    Polyurethane quart size

    Before the time were special painter's tape was created to eliminate paint seepage. Professional painters used polyurethane across regular beige masking tape to prevent paint mess.

    This post shows the two steps to creating a perfect line.

    Step 1: Fig.1 shows blue masking tape, a sponge brush 1-1/2 inch and clear polyurethane was used. Dipped the sponge into the quart size container and brushed on the right side on the blue masking tape (outlet side).
    Fig.1 Polyurethane
    Step 2: Fig.2 shows the secret is to use as little as possible on the side that is being painted will provide a sharp line. Let dry and then paint. The left side of the green wall a straight clean line
    .
    Fig.2 Straight Line Finished

    DIY Advisor Blogs:
  • Handyman Blog: DIY Advisor
  • Food Blog: From Kiwis To Pistachios
  • Artwork Blog: Light in Dark Artwork
  • Class-A Tests: DIY Class-A Drivers License Tests

    • Cookie Alert: European Union laws requires that you know that this blog uses cookies. If you are concerned about this please click here to see how Google uses this information.

    Note: The DIY Advisor assumes no liability for omissions, errors or the outcome of any jobs. The reader must always exercise reasonable caution, follow current codes and regulations that may apply, and is urged to consult with a licensed contractor if in doubt about any steps on these posts. All names were changed to protect client's privacy. DIY Advisor. Reproduction of site content including photos without permission prohibited. All rights reserved. © Copyright 2011-

    How to Hang Closet Kit


    Fig.1 Directions
    By Gary Boutin

    Supplies and Tools:
    Hanging shelf kit

    How do you install a hanging shelf?

    This post show the seven steps on how to install a closet hanging shelf.

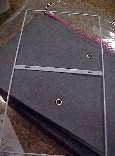
    Step 1: Fig.1 shows a look at the directions. No tools are required to assemble this type of hanging shelf, just follow the easy directions below. 
    Step 2: Fig.2 shows parts of the hanging closet, notice the metal handle for the hanging self.    
    Fig.2 Hooks
    Step 3: Fig.3 shows the hanging metal frame and the outside cover. 
    Fig.3 Frame
    Step 4: Fig.4 shows where the metal pole hangers will come out of. Place the metal frame inside the first partition of the hanging shelf.
    Fig.4 External
    Step 5: Fig.5
    shows thread the pole hangers into the metal frame.
    Fig.5 Pole hanger
    Step 6: Fig.6 shows and thread the pole hangers into the each side of the two holes in the exterior material.
    Fig.6 Thread pole hanger
    Step 7: Fig.7 shows the pole hangers are out of the eyes and onto a closet pole extend the shelf and open up each of the shelves within the unit. Now the unit is complete and time to fill up all those shelves with items. We chose to use this shelf to hold the dog bags, leashes that we need to walk them everyday.
    Fig.7 Job finished 
    closet organizer


    DIY Advisor Blogs:
  • Handyman Blog: DIY Advisor
  • Food Blog: From Kiwis To Pistachios
  • Artwork Blog: Light in Dark Artwork
  • Class-A Tests: DIY Class-A Drivers License Tests
    • Cookie Alert: European Union laws requires that you know that this blog uses cookies. If you are concerned about this please click here to see how Google uses this information.

    Note: The DIY Advisor assumes no liability for omissions, errors or the outcome of any jobs. The reader must always exercise reasonable caution, follow current codes and regulations that may apply, and is urged to consult with a licensed contractor if in doubt about any steps on these posts. All names were changed to protect client's privacy. DIY Advisor. Reproduction of site content including photos without permission prohibited. All rights reserved. © Copyright 2011-