Showing posts with label deck screws. Show all posts

Thursday, January 8, 2015

How to Make Backyard Wood Blind to Cover a Hole in Block Fence

Fig.1 The blind
By Gary Boutin 

Supplies and Tools:
1x6x8 redwood Tongue and Groove (2)
2x2x8 redwood lattice (2)
Clamps 
Compound saw or hand saw 
Deck screws 1 1/4 in.
Lattice beige vinyl cap molding 
                      3/4 in. x 1 in. x 4 ft
Tapcon polymer plated steel hex-washer-head indoor/outdoor 
                  concrete anchors 1/4 in. x 2-3/4 in.
Titebond glue 
Wood drill bit
Wood glue

Jim came to The Home Depot to place a wooden shutter from his backyard block wall. Some time ago he had a hole made in his block wall so he could see the valley from his home. Now the green valleys are filled with new homes. He came to the Anaheim Super Store - Lumber/Building Materials area for information and wanted information on redwood screen.

This post shows the seven steps to assembling block wall blind.

Step 1: Arrive at your nearest The Home Depot and talk to an associate.  If your project involves working with wood ask for the location of Lumber/Building Materials.
Step 2: Fig.1 shows a picture that Jim brought to me to explain the problem. The brown area is the area of concern. The Home Depot carries Douglas Fir tongue and groove will be used across the expanse of the missing block.
Step 3: Fig.2 shows that Jim decided to purchase 1x6x8 redwood tongue and groove. He had both boards cut in half by a lumber associate. Below the wood is being cut to size.
Fig.2 Cutting the planks
Step 4: Now Jim wanted an easy but good looking wood edge to lay on the brick wall. I showed him the mill works area but none fitted correctly against the Tongue and Groove planks. I brought him to the garden area where the 2x2 plastic channel were being stored. 
Step 5: Fig.3 shows we decided on using beige vinyl cap molding. The planks once glued would be surrounded by the molding. It worked perfectly except the sides of the wood screen. Another molding was cut to accommodate the sides of the wood screen.
Fig.3 Laying all the planks 
and cap molding on the floor
Step 6: Fig.4 shows the final assembly to show Jim how to assemble the project.

Fig.4 Final check
Step 7: Blind instructions:
  1. The glue to use on the edges of the tongue and groove boards, make sure the boards are flat and the ends even. Each board is 5-1/2 wide and 4-foot long for a total 2-boards totaling 11 in. long.
  2. Use wood clamps to clamp each end of the boards.
  3. When the board are together cut off the groove side of the board. Removing the groove will give the board a larger flat area.
  4. After the boards are glued together, place the top and bottom cap on each side.
  5. Drill three holes in each cap molding approximately 4-inch on each end and 24 in. the middle hole.
  6. Fig.5 shows that the insertion of three deck screws into the plastic cap and into the tongue and grove boards and two more on each end.
  7. Do this on both horizontal side.
  8. Now insert the deck screws on the lateral side.
  9. Now pick up the entire unit and place it on top of the cement wall. To secure the panel to the brick wall drill into the wood cap first and another hole into the cement. Using Tapcon polymer plated steel hex-washer-head indoor/outdoor concrete anchors 1/4 in. x 2-3/4 in. This is the very best anchoring system. For more information click on Tapcon above.
Fig.5 Deck screw locations
Jim never came by to show off his handiwork. So I am assuming the blind worked and he no longer had to stare at the new development that was happening near his home.  


Update: DIY Advisor has New blogs check them today:
  • Cookie Alert: European Union laws requires that you know that this blog uses cookies. If you are concerned about this please click here to see how Google uses this information.

Note: The DIY Advisor assumes no liability for omissions, errors or the outcome of any jobs. The reader must always exercise reasonable caution, follow current codes and regulations that may apply, and is urged to consult with a licensed contractor if in doubt about any steps on these posts. All names were changed to protect client's privacy. DIY Advisor. Reproduction of site content including photos without permission prohibited. All rights reserved.© Copyright 2011-
 

Thursday, April 25, 2013

How to Hang Pre-hung Door - Part 5 of 15 - Installing Door

By Gary Boutin
Claw Hammer


Supplies and Tools:
Cordless screwdriver with Phillip bit
Claw hammer
Deck screws 3-inch
Drill bit set
Level 4-foot and 2-foot level
Painter scraper thick blade
Pre-hung metal door

Mr. Victor Longpont hired my services to remove his garage door that had become damaged after a bad rain storm. The door had not been painted for over 30 years, the bottom of the door was damaged by a badly worn door shoe and sweep that allowed water into the bottom of the door. In this job Dave Vickers, was invaluable in solving the details of this job.

This post shows the ten steps on how to install a pre-hung garage door.

Step 1: Fig.1 shows Dave's truck that was used to pick up and deliver the pre-hung door. Fig.2 shows the pre-hung door that was purchased at Lowe's Warehouse Store.
Fig.1 Truck to transport door
Fig.2 New door and wood frame
Step 2: Fig.3 shows the door must be unpacked before placing it in the door area. Remove all the cardboard packaging around the door. The hard fiberboard on the bottom of the door and both sides of the door shoe will needs to be removed. Fig.4 shows a claw hammer with a thick blade scraper that will pull away the fiberboard away from the door. There are staples in place to protect the bottom of the door. The staples are very sharp watch your hands.
Fig.3 Remove hardboard 
from bottom of door
Fig.4 Use a scraper
Step 3: After the fiberboard have been removed, the next step is to remove the plastic lock plate.  The lock plate locks the door in place while at the store to prevent the door from popping its hinges and damaging its integrity. This plastic lock must to be removed before the door is placed in the doorway area. Fig.5 shows the black plastic lock in the pre-drilled lock plate area.
Fig.5 Remove lock bolt
Step 4: The door has has brass hinges plastic caps, remove them before placing the door in the doorway. The caps are there to keep the brass hinge polished and in good condition for transport. 
Step 5: Next with a friend place the pre-hung door in the doorway. Use a 4-foot level to level the door in both directions. 
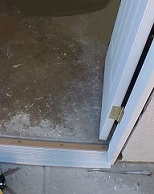
Step 6: Notice fig.6 and fig.7 shows the door is in the doorway, the door is not secured and needs to be screwed into the wood studs.
Fig.6 New threshold plate
Fig.7 Sides need caulking
Step 7: Fig.8 shows the handyman holding two small wood drills that will be used to pre-drilled the door wood frame. This pilot hole will reduce damage to the exterior wood frame prior to  installing the decks screws into the door. Some installers use nails but with screws the door can be adjusted within the door area to get a good fit.
Fig.8 Titanium wood drills
Step 8:
Fig.9, fig.10 and fig.11 shows the drill used to make the pilot holes. Three holes on the side of each door jamb top, middle and bottom and matching on the other side.  The top door jamb only needs tow holes on each side.
Fig.9 Pilot hole for the top
Fig.10 Pilot hole for the middle area
Fig.11 Pilot hole for the bottom jamb
Step 9: Fig. 12 and fig.13 shows that after the pilot holes have been drilled, use the cordless screwdriver to drive in the deck screws into the wood stud.
Fig.12 Inserting deck screws
Fig.13 Inserting 
bottom latch side
Step 10: Fig.14 shows the one hole by the brass hinge and fig.15 shows the two holes that have been screwed into the wood stud.
Fig.14 New clean hinge
Fig.15 Holes in new frame

How to Hang a Pre-hung Door:


  • Part 1 of 15 Introduction Why Replace This Garage Door
  • Part 2 of 15 Removing The Damaged Door
  • Part 3 of 15 Door Hardware Removed
  • Part 4 of 15 Door Threshold Removal
  • Part 5 of 15 Installing Door
  • Part 6 of 15 Recycled Metal Removed
  • Part 7 of 15 Caulking Outside Door Edges
  • Part 8 of 15 New Door Hardware Installed
  • Part 9 of 15 Caulking Door Screws Holes
  • Part 10 of 15 Inside Door Mud
  • Part 11 of 15 Inside Door Taping
  • Part 12 of 15 Inside Door Painted
  • Part 13 of 15 Applying Stucco To Door Edge
  • Part 14 of 15 Exterior Door Molding
  • Part 15 of 15 Old Door Cut to Trash


  • Update: DIY Advisor has New blogs check them today:

    • Cookie Alert: European Union laws requires that you know that this blog uses cookies. If you are concerned about this please click here to see how Google uses this information.

    Note: The DIY Advisor assumes no liability for omissions, errors or the outcome of any jobs. The reader must always exercise reasonable caution, follow current codes and regulations that may apply, and is urged to consult with a licensed contractor if in doubt about any steps on these posts. All names were changed to protect client's privacy. DIY Advisor. Reproduction of site content including photos without permission prohibited. All rights reserved. © Copyright 2011-

    Sunday, January 22, 2012

    Bathroom Limestone - Part 1 of 3 - Vinyl Floor Removed and Sub Floor Replaced


    All supplies

    By Gary Boutin 

    Supplies and Tools:
    Acrylic caulking latex 
    Caulk gun
    Circular saw
    Cordless drill 12 and 18-volt
    3 3/8-inch cordless circular saw
    Deck screws
    Douglas fir stud 2x4x8 
    Fiberglass R30
    Mechanics gloves
    Oriented strand boards (OSB) 19/32-inch
    Phillips screwdriver 
    Reciprocating blades 
    Vacuum 

    This job is located in the City of Pomona, a multi-story condominium in a beautiful rural setting with mature oak trees and a well established community.

    The post shows the thirteen steps to the removal and replacement of a hallway bathroom floor. 

    Step 1: Fig.1 shows the project was started by the homeowner who removed the vanity, the plumbing except the stop valves, ABS drain line, and the floor around the toilet.
    Fig.1 Only sink lines are left
    Step 2: Fig.2 and fig.3 shows the old linoleum floor. The reason the floor has been removed is that the old floor had holes in it and was leaking water into the garage.
    Fig.2 Linoleum
    Fig.3 Floor holes


    Step 3: Fig.4 shows that the entire linoleum floor needed removal including around the toilet.
    Fig.4 Vinyl cover removed
    Step 4: Fig.5 shows Carl cutting the old damaged flooring using a 3-3/8-inch cordless circular saw. 
    Fig.5 Cut plywood out
    Step 5: Fig.6 shows that we completed removal of the floor, and now we installed Douglas Fir 2x4 wood edges to hang the new floor on. The old floor stopped at the wall, but had no wood edges.
    Fig.6 Additional bracing
    Step 6: Fig.7 shows the circular saw used to cut the floor edges to be fitted on the floor.  
    Fig.7 Floor removed
    Step 7: Fig.8 shows the removed wet fiberglass and vacuumed the area of dirt, dust and wood chips.
    Fig.8 Clean up the mess

    Step 8: Fig.9 shows that we replaced the damaged fiberglass. 
    Fig.9 Replace the 
    wet fiberglass
    Step 9: Fig.10 shows the bathroom fiberglass was replaced in the floor area.
    Fig.10 Installing 
    new fiberglass
    Step 10: Fig.10 shows Carl starting to measure the area for a new side support.
    Fig.10 Measuring the floor
    Step 11: Fig.11 shows the cutting of the OSB particle board.
    Fig.11 OSB board trimmed
    Step 12: Fig.12 shows that the floor with the new sub-floor installed. Carl is using a cordless drill to screw in deck screws that will never rust.


    Fig.15 Screwing the floor
    Step 13: Fig.16 shows Carl has caulked the floor edges with silicone. The first part of this job is now completed.
    Fig.16 Caulking to 
    the floor gaps
    Bathroom Limestone Tiling:

    DIY Advisor Blogs:
  • Handyman Blog: DIY Advisor
  • Food Blog: From Gary Boutin
  • Artwork Blog: Light in Dark Artwork
  • Class-A Tests: DIY Class-A Drivers License Tests
    • Cookie Alert: European Union laws requires that you know that this blog uses cookies. If you are concerned about this please click here to see how Google uses this information.

    Note: The DIY Advisor assumes no liability for omissions, errors or the outcome of any jobs. The reader must always exercise reasonable caution, follow current codes and regulations that may apply, and is urged to consult with a licensed contractor if in doubt about any steps on these posts. All names were changed to protect client's privacy. DIY Advisor. Reproduction of site content including photos without permission prohibited. All rights reserved. © Copyright 2011-