Showing posts with label square. Show all posts

Tuesday, December 2, 2014

How to Repair Wall Hit By Oldsmobile - Part 2 of 2 - The Finish

Popping nails
By Gary Boutin 

Supplies and Tools: 
500 Watt drying lamps
Baseboard (wood)
Brads
Brad nailer 
Caulking gun (manual) 
Compressor with 50 ft hose 
Duplex plug 
Drywall 1/2 inch
Drywall knives (floating)
Drywall square
Wall knives
Drywall screws (coarse)
Drywall tape (paper)
Electrical cords 
Joint compound
Latex caulk
Tarps (this one is gray)
Texture (Orange peel) 
Towel or rags (clean)
Utility knife (extra blades) 

George Baker is a used car salesman who live in Chino Hills, California and lives near a golf course. George is a tinkerer and he touches everything he thinks he can repair. He did mention that his mother-in-law had pulled up to far from the driveway and had just touched the bedroom wall. He had tried to push the wall back using 1x4 lumber. When Mrs. Baker arrived home she wanted the damage correctly repaired. Mrs Baker had removed the wood support when I arrived and large 16D nails were still on the bedroom walls.

This post shows the six steps on how to finish the bedroom wall repair job. 

Step 1: Fig.1 and fig.2 shows the new wall board is drying and this part of the job is done. Notice its dark outside.
Fig.1 Job drying
Fig.2 Joint compound is dry
Step 2: Fig.3 shows the left over wallboard from the job.
Fig.3 Left-over drywall (wallboard)
Step 3: Fig.4 shows the compressor that will be used with a brad nailer to place the existing baseboard over the new repairs.
Fig.4 Air compressor
Step 4: Fig.5 and fig.6 shows the brad nailer attaching the baseboard against the wall.
Fig.5 Attaching baseboard
Fig.6 Attaching the corner
Step 5: Fig.7 and fig.8 shows the application of latex caulk to the top of the baseboards. This give the baseboard a more finished look and prevent insects from laying their eggs behind the baseboards.
Fig.7 Latex caulk
Fig.8 Caulking corners
Step 6: Fig.9 shows a clean towel removing excess caulking from the walls.
Fig.9 Removing caulk

How to Repair a Wall Hit By an Oldsmobile:


  • Part 1 of 2 - The setup
  • Part 2 of 2 - The Finish

  • Update: DIY Advisor has New blogs check them today:
    • Cookie Alert: European Union laws requires that you know that this blog uses cookies. If you are concerned about this please click here to see how Google uses this information.

    Note: The DIY Advisor assumes no liability for omissions, errors or the outcome of any jobs. The reader must always exercise reasonable caution, follow current codes and regulations that may apply, and is urged to consult with a licensed contractor if in doubt about any steps on these posts. All names were changed to protect client's privacy. DIY Advisor. Reproduction of site content including photos without permission prohibited. All rights reserved. © Copyright 2011-

    Monday, September 2, 2013

    How to Paint Garage Bedroom - Part 3 of 19 - Move Data and TV Cables

    Fig.1 All the cables
    By Gary Boutin

    Supplies and Tools:
    Claw hammer
    Drywall saw or Razor knife
    Square

    Mrs. Dee wanted to upgrade her bedroom/office. She wanted the bedroom wall fixed, new baseboards to replace the missing ones, new ceiling and walls painted and she needed this job done as fast as possible. Her new tenet would arrive in three days.

    This post shows the seven steps to place the coaxial cable at a lower location on the wall.

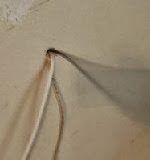
    Step 1: Fig.1 shows a white coaxial wire, an old black cable television, and a flat data communication cable that need to be brought down just above the air conditioner vent.
    Step 2: Fig.2 shows the removal of the old black coaxial cable no longer working and was pulled from the laundry side of the wall and disposed of in the trash can.
    Fig.2 All three wires 
    in the middle of the wall
    Step 3: Fig.3 shows the data communication cable and the new white coaxial cable.
    Fig.3 Data cord
    Step 4: Take a square and draw a straight line from the center of hole to the A/C vent. Fig.4 shows a claw hammer and a razor knife cutting the wall to move the wires down. This takes some time so be patient. A drywall saw is also an alternative choice. After the job is done throw away the metal knife blade.
    Fig.4 Cutting into wall
    Step 5: Fig.5 shows the line has been cut and the wires need to be moved downwards.
    Fig.5 Cable to be
     pulled down
    Step 6: Fig.6 shows the wires are being moved downward.
    Fig.6 Top edge
    Step 7: Fig.7 shows that the wires are at the lowest point just above the A/C vent. The next post will address filling in the hole in the wall.
    Fig.7 Bottom edge
    How to Paint a Garage Bedroom:

    Update: DIY Advisor has New blogs check them today:

    • Cookie Alert: European Union laws requires that you know that this blog uses cookies. If you are concerned about this please click here to see how Google uses this information.

    Note: The DIY Advisor assumes no liability for omissions, errors or the outcome of any jobs. The reader must always exercise reasonable caution, follow current codes and regulations that may apply, and is urged to consult with a licensed contractor if in doubt about any steps on these posts. All names were changed to protect client's privacy. DIY Advisor. Reproduction of site content including photos without permission prohibited. All rights reserved. © Copyright 2011-