Showing posts with label paint. Show all posts

Saturday, March 15, 2014

How to Paint Garage Bedroom - Part 11 of 19 - Paint - Rolling Walls

Four inch roller cover
By Gary Boutin

Supplies and Tools:
Paint bucket
Paint pole (extends the roller frame for easier rolling)
Paint gloves Nitrile
Paint liner (plastic)
Paint tarps (cloth and paper)
Paint tray
Paint roller
Paint

Mrs. Dee needed to repair and repaint her bedroom before her net tenet would arrive.

This post shows twelve steps on painting the walls. 

Step 1: Fig.1 shows the tools are all ready to roll the paint on the ceiling and the walls.
Fig.1 Rolling the walls
Step 2: Fig.2 shows the paint roller with paint pole being used to roll the paint on the corner wall.
Fig.2 Rolling by the window
Step 3: Fig.3 shows the paint roller is being rolled up and down the paint tray to apply more paint on the roller.

Fig.3 Roll the paint roller back and forth
Step 4: Fig.4 shows the left side of the wall is being rolled.
Fig.4 Paint the wall damage first coat
Step 5: Fig.5 shows the roller rolls the paint between both the cutting paint.
Fig.5 Paint around the cutting edges
Step 6: Fig.6 shows the wall was just rolled and the paint is wet on the wall.
Fig.6 Shows the paint drying
Step 7: Fig.7 shows the back wall bottom is painted.
Fig.7 Corner painted
Step 8: Fig.8 shows the ceiling and the wall are painted and match perfectly.
Fig.8 Door painted
Step 9: Fig.9 shows the wall has been painted.
Fig.9 Walls painted
Step 10: Fig.10 shows the A/C vent needs to be painted.

Fig.10 Vents painted
Step 11: Fig.11 shows the wall has been painted.
Fig.11 bedroom painted
Step 12: Fig.12 shows that the room is almost painted.
Fig.12 Now to pick up tarps
How to Paint a Garage Bedroom:
Note: The DIY Advisor assumes no liability for omissions, errors or the outcome of any jobs. The reader must always exercise reasonable caution, follow current codes and regulations that may apply, and is urged to consult with a licensed contractor if in doubt about any steps on these posts. All names were changed to protect client's privacy. DIY Advisor. Reproduction of site content including photos without permission prohibited. All rights reserved. © Copyright 2011-

How to Paint Garage Bedroom - Part 10 of 19 - Paint - Cutting the Walls

By Gary Boutin
Plastic and wood paddle


Supplies and Tools:
Brush 1-1/2 inch
Yellow paint container
Paint  
Paint tarps

Mrs. Dee wanted to upgrade her bedroom before her new tenet would arrive in three days.

This post shows the eleven steps on how to cut the wall and ceiling edges.

Step 1: Fig.1 shows the paint is mixed and ready to use.
Fig.1 Mixed paint
Step 2: Fig.2 shows the yellow paint container used to hold the paint. A 1-1/2 inch brush is used to paint the edges of the wall, around electrical switchers, lamp, air registers, wood molding and windows.
Fig.2 Paint brush
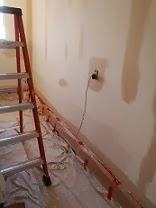
Step 3: Fig.3 shows the paint cutting by the door and the electrical outlet.
Fig.3 Electrical outlet
Step 4: Fig.4 shows the paint cutting above the door and one of the corners. This job the ceiling is being painted with the same color.
Fig.4 Upper right side of wall
 Step 5: Fig.5 shows a the bedroom entrance of the right side of the wall.
Fig.5 Left side A/C vent
Step 6: Fig.6 shows painting around the door frame, a large plastic is placed on the door to protect it from paint splatter.
Fig.6 Behind door
Step 7: Fig.7 shows a corner edge and the spots on the wall are damages that need extra paint.
Fig.7 Right side
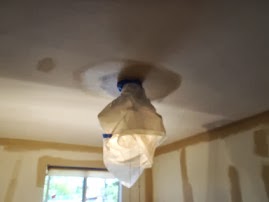
Step 8: Fig.8 shows the ladder was used to paint the ceiling around the ceiling fan.
Fig.8 Painting ceiling lamp edge
Step 9: Fig.9 shows one corner that has been cut. Other areas have been painted to cover wall repair.
Fig.9 Corner cutting
Step 10: Fig.10 shows the wall above the wood molding has been painted.
Fig.10 Floor cutting
Step 11: Fig.11 shows the cutting around the door and the ceiling and corner areas.
Fig.11 Above door and corner cutting
How to Paint a Garage Bedroom:
Note: The DIY Advisor assumes no liability for omissions, errors or the outcome of any jobs. The reader must always exercise reasonable caution, follow current codes and regulations that may apply, and is urged to consult with a licensed contractor if in doubt about any steps on these posts. All names were changed to protect client's privacy. DIY Advisor. Reproduction of site content including photos without permission prohibited. All rights reserved. © Copyright 2011-

Wednesday, March 27, 2013

How to Paint Shed Wall

Fig.1 Shed wall reflects 
light into living room
By Gary Boutin

Supplies and Tools:
Gloves nitrile disposable
Hammer claw 
Paint stirring stick
Masking tape 
Paint tarps
Paint tray
Paint brush 1 inch, 2 inch
Paint (supplied by customer)
Paint frame
Paint roller cover
Primer latex

Mrs. Appleton noticed my work building a retaining wall. She stopped by and asked if I could paint her shed.  

This post shows the six steps to painting an exterior shed wall. 

Step 1: Fig.1 shows the shed wall was facing her living room and was reflecting the sun light into her living room. 
Step 2: Fig.2
shows the tools needed for this job. 
Fig.2 All 
tools needed
Step 3: Fig.3 shows that a painters tarp was used to protect the cement and the grass area near the shed wall. One coat of exterior white primer was painted over the white semi gloss paint before applying the light brown exterior paint provided by Mrs. Appleton.
Fig.3 
painter's tarp
Step 4: Fig.4 and fig.5 shows the edge cutting. Edge cutting is painting the edges of the shed wall because the paint roller can not do a good job or rolling near the edge.

Fig.4 Paint edges
Fig.5 Paint shed wall 
perimeter first
Step 5: Fig.6 and fig.7 shows the wall has been rolled and now a simple touch up.
Fig.6 Touch ups
Fig.7 Fill-up
Step 6: Fig.8 shows the paint can lids being hammered down to secure the paint cans. Fig.9 shows the job is finished and now the wall will not reflect as much light in her living room again.
Fig.8 Paint cans
Fig.9 Shed 
wall painted


Update: DIY Advisor has New blogs check them today:

  • Cookie Alert: European Union laws requires that you know that this blog uses cookies. If you are concerned about this please click here to see how Google uses this information.

Note: The DIY Advisor assumes no liability for omissions, errors or the outcome of any jobs. The reader must always exercise reasonable caution, follow current codes and regulations that may apply, and is urged to consult with a licensed contractor if in doubt about any steps on these posts. All names were changed to protect client's privacy. DIY Advisor. Reproduction of site content including photos without permission prohibited. All rights reserved. © Copyright 2011-