Showing posts with label diagonal cutters. Show all posts

Monday, April 6, 2015

How to Repair Kitchen Nook Wall - Part 2 of 5 - Removing Wallpaper

Fig.1 Dining room walls damages
Left, middle and right wall repair
By Gary Boutin
 
Supplies and Tools: 
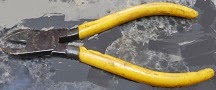
Diagonal cutters (cutting nails)
Razor knife and extra blades
Tarps cotton 9 ft. x 12 ft.
Vice grips pliers
Wall saw - rubber handle

My favorite client located Santa Clarita were selling their home and moving to Colorado. A Realtor checked all room in their home and she requested the repair to be addressed immediately. The kitchen nook dining room wallpaper was loose and needed repair. Two kitchen windows on the side had bad rubber seals and leaked water.

This post shows the nine steps to determine if the wall could be saved or if the wall needed to be completely replaced.

Step 1: Fig.1 shows the dining room that needed repair.
Step 2: Fig.2 shows the peeling wallpaper under the sealed window and it shows that the wall is very wet and damaged. The paper and insulation was leaking water from behind the wallpaper.
Fig.2 Peeling wallpaper
Step 3: Fig.3 shows the wallpaper underneath the main center window. Notice the mold on the left upper side of the wall. Fig.4 shows the wall is buckling under the weight of the water inside the wallboard and wall insulation. This section of the wall needs to be removed and replaced.
Fig.4 Bloated by baseboards
Fig.3 Bloated wallboard 
by baseboards
Step 4: Fig.5 shows the wall on the left side of the middle window wall also damaged mostly both corners of the window wall. 
Fig.5 Damaged and moldy wall
Step 5: Fig.6 shows the right side of the wall that was badly damaged. This wall was missing all the texture including the paint from the wall. It was down to the wet cardboard.
Fig.6 Wet cardboard

Step 6: Fig.7 and fig.8 shows the corner from the left side to the middle wall. The corner completely fell apart when touched from the water damage.
Fig.7 Corner fell apart
Fig.8 Wet fiberglass
Step 7: Fig.9 and fig.10 shows a drywall saw removing wet wallboard.
Fig.9 Cut area
Fig.10 Square area for repair
Step 8: Fig.11 and fig.12 shows the use of vice grip pliers removing sheetrock nails from the studs. Hard to replace the wallboard if an existing nail is there in the wood stud. The new wall will not be level if there is anything that prevent the wallboard from being attached to the wood stud.
Fig.11 Removed nails
Fig.12 Vice-grips
Step 9: Fig.13 shows that diagonal cutter are used to remove the rusted nails from the inside of the baseboard. Fig.14 shows that the wall was so badly decomposed that the most of the wall sections needed to be replaced.
Fig.13 Diagonal cutters
Fig.14 Damaged Wall
How to Repair a Kitchen Nook Wall:


Update: DIY Advisor has New blogs check them today:
  • Cookie Alert: European Union laws requires that you know that this blog uses cookies. If you are concerned about this please click here to see how Google uses this information.


Note: The DIY Advisor assumes no liability for omissions, errors or the outcome of any jobs. The reader must always exercise reasonable caution, follow current codes and regulations that may apply, and is urged to consult with a licensed contractor if in doubt about any steps on these posts. All names were changed to protect client's privacy. DIY Advisor. Reproduction of site content including photos without permission prohibited. All rights reserved. © Copyright 2011-

Wednesday, August 21, 2013

How to Remove a Plastic Pet Fence - Part 2 of 2 - Cleaning for Painting

Fig.1 Cleaner
By Gary Boutin

Supplies and Tools:
Ajax® cleaner
Diagonal cutters
Hose bib with water
Scrub sponge
Trash can
White brush

Every five years Mrs Baker's association recommends that the iron work around her home needs to be freshened up. It was the owner's responsibility to clean these metal gates of dirt, bird droppings and anything else that might make it difficult for the painters to do their work. Mrs Baker called my repair service to take care of her gate.

This post shows the six steps of removing any dirt and bird droppings on the iron gate. 

Step 1: Fig.1 shows Ajax® liquid soap used to clean the birds dropping and dirt from the metal gate.
Step 2: Fig.2 shows drop several drops of Ajax® cleaner were placed into this water pail.
Fig.2 Red water pail
Step 3: Fig.3 and fig.4 shows the gate being cleaned of dirt by a white brush.
Fig.3 Cleaning the gate
Fig.4 Cleaning the dirt
Step 4: Fig.5 and fig.6 shows green dish scrubber cleaning the dirt that had accumulated on the metal bars.
Fig.5 Cleaning the bar details
Fig.6 Cleaning the bars
Step 5: Fig.7 shows the metal decorative knobs on the gate are cleaned of dirt and looking clean.
Fig.7 Decorative knob
Step 6: Fig.8 shows the gate is now clean and ready to be painted by the professionals.
Fig.8 A clean gate

How To Remove a Metal Gate Pet Fence:

  • Removing the Pet Fenced
  • Cleaning for Painting
  •  
    Update: DIY Advisor has New blogs check them today:

    • Cookie Alert: European Union laws requires that you know that this blog uses cookies. If you are concerned about this please click here to see how Google uses this information.

    Note: The DIY Advisor assumes no liability for omissions, errors or the outcome of any jobs. The reader must always exercise reasonable caution, follow current codes and regulations that may apply, and is urged to consult with a licensed contractor if in doubt about any steps on these posts. All names were changed to protect client's privacy. DIY Advisor. Reproduction of site content including photos without permission prohibited. All rights reserved. © Copyright 2011-

    How to Remove a Plastic Pet Fence - Part 1 of 2 - Removal

    Fig.1 Dog fence being removed
    By Gary Boutin

    Supplies and Tools:

    Diagonal cutters
    Trash can

    Every five years Mrs Baker's association recommends that the iron work around her home needs to be freshened up. For example metal gates, any metal ornaments that would be the responsibility of the association. Anything that was attached to the building would be painted by professional painters. It was the owner's responsibility to clean these metal gates of dirt, bird droppings and anything else that might make it difficult for the painters to do their work. A cleaning charge would be given to each homeowner who disregarded the association warning. Mrs Baker called my repair service to take care of her gate.

    This post shows the six steps of removing the pet fence from the iron gate.

    Step 1: Fig.1 shows metal gate had a plastic fence to keep an animal inside, long not used. The prior installer used white electrical ties to hold the plastic fencing on the metal gate.
    Step 2: Fig.2 shows diagonal cutters used to cut the electrical ties from the gate.
    Fig.2 Diagonal cutter
    Step 3: Fig.3 shows the diagonal cutters releasing the tie from the gate.
    Fig.3 Cutting the tie
    Step 4. Fig.4 shows the plastic fence at the bottom of the gate is still being held by the electrical ties.
    Fig.4 Bottom of gate
    Step 5. Fig.5 shows a close up of the electrical tie on the pet fence and the metal gate.
    Fig.5 Close up of electrical tie
    Step 6. Fig.6 shows the cut up electrical ties that held the dog fence and now will be disposed into the trash can.

    Fig.6 Close up of electrical ties


    How to Remove a Metal Gate Pet Fence:


  • Removal
  • Cleaning for Painting


  • Update: DIY Advisor has New blogs check them today:

    • Cookie Alert: European Union laws requires that you know that this blog uses cookies. If you are concerned about this please click here to see how Google uses this information.

    Note: The DIY Advisor assumes no liability for omissions, errors or the outcome of any jobs. The reader must always exercise reasonable caution, follow current codes and regulations that may apply, and is urged to consult with a licensed contractor if in doubt about any steps on these posts. All names were changed to protect client's privacy. DIY Advisor. Reproduction of site content including photos without permission prohibited. All rights reserved. © Copyright 2011-