Showing posts with label trash can. Show all posts

Wednesday, April 29, 2015

How to Remove Bottom Brick from a Block Wall

Fig.1 Block wall
By Gary Boutin

Supplies and Tools:
Rotary Hammer
Spline Shank Cold Chisel
Trash can 

Mr. Holudu called to have a backyard cement brick removed from his fence. He wanted a hole so he could move his watering hose from the backyard to the side yard.

This post shows the five steps to remove brick block fence. 
 
Step 1: Fig.1 shows a new block wall that needs to be worked on.
Step 2: Fig.2 shows the rotary hammer with chisel that was used to remove the brick from the bottom of the wall.

Fig.2 Rotary Hammer


Step 3: Fig.3 shows the Rotary Hammer highlights.
Fig.3 Rotary hammer highlights

Step 4: Fig.4 shows the Spline Shank Cold Chisel (12-inch or longer) to chisel away the brick part. Do not cut the bottom brick on the footer. This will damage the wall. Cut the brick above the footer brick and the wall will still be fine.
Fig.4 Chiseled out hole
Step 5: Fig.5 shows a close up view of the brick removed.
Fig.5 Brick removed, job finished


Update: DIY Advisor has New blogs check them today:
  • Cookie Alert: European Union laws requires that you know that this blog uses cookies. If you are concerned about this please click here to see how Google uses this information.


Note: The DIY Advisor assumes no liability for omissions, errors or the outcome of any jobs. The reader must always exercise reasonable caution, follow current codes and regulations that may apply, and is urged to consult with a licensed contractor if in doubt about any steps on these posts. All names were changed to protect client's privacy. DIY Advisor. Reproduction of site content including photos without permission prohibited. All rights reserved. © Copyright 2011-

Saturday, March 1, 2014

How to Demolished a Wood Workbench

Fig.1 Work bench
By Gary Boutin

Supplies and Tools:
Electric Skillsaw® radial saw 12 inch blade 
Electric cord 25 foot
Trash can 

I was called by a Mr. Applehumber in Santa Clarita, California. They were selling their homes and moving up to Colorado. After the Realtor checked their beautiful home, she requested a huge laundry list of repairs. Jim wanted a wood work bench removed and cut up for disposal and it weighed over 250 pounds. 

This post shows the fifteen steps to demolished a wood work bench. 

Step 1: Fig.1 shows the garage and the work bench that need to be removed from the garage.
Step 2: Fig.2 and fig.3 shows the empty work bench for demolish.
Fig.2 The bench
Fig.3 Radial saw on bench
Step 3: Fig.4 shows the Skillsaw® electric radial saw that will be used to cut up the wood bench.
Fig.4 Skillsaw 6 1/2 inch electric saw
Step 4: Fig.5 shows the first cut using the radial saw on the bench.
Fig.5 First cut
Step 5: Fig.6 shows the radial saw bottom blade going through the wood bench.
Fig.6 Radial blade
Step 6: Fig.7 shows a back shot of the radial saw cutting the work bench.
Fig.7 Top cut
Step 7: Fig.8 shows the radial saw cut the middle of the workbench.
Fig.8 Cutting top off
Step 8: Fig.9 shows table top cut in 1-foot cuts across the table.
Fig.9 Top cut off
Step 9: Fig.10 shows table top has been cut up in length size pieces.
Fig.10 Top cut into strips
Step 10: Fig.11 shows the pieces are cut up in smaller pieces.
Fig.11 Garage floor wood pile
Step 11: Fig.12 shows the table top has been cut up for disposal. The remaining 2x8x10 that held the table top are left to be cut up.
 Fig.12 Top sawed off
Step 12: Fig.13 shows side view of top, only the bottom shelf and the two top rails are left to cut up.
 Fig.13 2X8 lateral boards 
Step 13: Fig.14 shows one top rail has been cut up and removed.
 Fig.14 - 2X8 Boards being cut
Step 14: Fig.15 shows the remnants of the wood bench is cut up and being placed into the trash can. The trash truck is there to help move the heavy trash can to the street curb.
 Fig.15 Wood being disposed
Step 15: Fig.16 shows the last of the workbench is ready to be disposed.
 Fig.16 Piles of wood

Update: DIY Advisor has New blogs check them today:

  • Cookie Alert: European Union laws requires that you know that this blog uses cookies. If you are concerned about this please click here to see how Google uses this information.

Note: The DIY Advisor assumes no liability for omissions, errors or the outcome of any jobs. The reader must always exercise reasonable caution, follow current codes and regulations that may apply, and is urged to consult with a licensed contractor if in doubt about any steps on these posts. All names were changed to protect client's privacy. DIY Advisor. Reproduction of site content including photos without permission prohibited. All rights reserved. © Copyright 2011-

Wednesday, August 21, 2013

How to Remove a Plastic Pet Fence - Part 1 of 2 - Removal

Fig.1 Dog fence being removed
By Gary Boutin

Supplies and Tools:

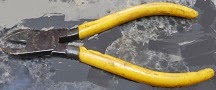
Diagonal cutters
Trash can

Every five years Mrs Baker's association recommends that the iron work around her home needs to be freshened up. For example metal gates, any metal ornaments that would be the responsibility of the association. Anything that was attached to the building would be painted by professional painters. It was the owner's responsibility to clean these metal gates of dirt, bird droppings and anything else that might make it difficult for the painters to do their work. A cleaning charge would be given to each homeowner who disregarded the association warning. Mrs Baker called my repair service to take care of her gate.

This post shows the six steps of removing the pet fence from the iron gate.

Step 1: Fig.1 shows metal gate had a plastic fence to keep an animal inside, long not used. The prior installer used white electrical ties to hold the plastic fencing on the metal gate.
Step 2: Fig.2 shows diagonal cutters used to cut the electrical ties from the gate.
Fig.2 Diagonal cutter
Step 3: Fig.3 shows the diagonal cutters releasing the tie from the gate.
Fig.3 Cutting the tie
Step 4. Fig.4 shows the plastic fence at the bottom of the gate is still being held by the electrical ties.
Fig.4 Bottom of gate
Step 5. Fig.5 shows a close up of the electrical tie on the pet fence and the metal gate.
Fig.5 Close up of electrical tie
Step 6. Fig.6 shows the cut up electrical ties that held the dog fence and now will be disposed into the trash can.

Fig.6 Close up of electrical ties


How to Remove a Metal Gate Pet Fence:


  • Removal
  • Cleaning for Painting


  • Update: DIY Advisor has New blogs check them today:

    • Cookie Alert: European Union laws requires that you know that this blog uses cookies. If you are concerned about this please click here to see how Google uses this information.

    Note: The DIY Advisor assumes no liability for omissions, errors or the outcome of any jobs. The reader must always exercise reasonable caution, follow current codes and regulations that may apply, and is urged to consult with a licensed contractor if in doubt about any steps on these posts. All names were changed to protect client's privacy. DIY Advisor. Reproduction of site content including photos without permission prohibited. All rights reserved. © Copyright 2011-