Tuesday, May 21, 2013

How to Make Decorative Gold Plant Spike For The Front Patio

Fig.1 Spikes and vase
By Gary Boutin

Supplies and Tools:
Decorative gold plant spikes
Marble pot
Razor knife
Styrofoam

Mrs. Black wanted to decorate her front door patio. She had purchase the marble pot, the decorative plant life and pieces of Styrofoam™ from an earlier shipment.  Being busy she called me to place this arrangement together.  

This post shows the six steps to place an decorative dried plant arrangement together.

Step 1: Gather together all your items. Above right fig.1 shows the marble pot, and the dried gold plant spikes.   
Step 2: Fig.2 shows the a razor knife that will be used to cut up the Styrofoam. 
Fig.2 Standard razor knife
Step 3: It takes a small pieces of Styrofoam into the stone pot.
Step 4: Fig.3 shows the cut up the branches and place a few into a bunch.
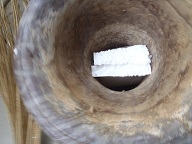
Fig.3 Stone vase with 
Styrofoam (TM)
Step 5: Fig.4 shows that by Pushing the branches into the Styrofoam®. The Styrofoam® will hold the gold spikes straight and into the pot. Fig.5 shows the gold spikes ends placed into the
Styrofoam®
Fig.4 End of gold spikes
Fig.5 Ends in foam
Step 6: Fig.6 shows the decorative spikes into the stone pot placed into the patio area.
Fig.6 Finished


Update: DIY Advisor has New blogs check them today:

  • Cookie Alert: European Union laws requires that you know that this blog uses cookies. If you are concerned about this please click here to see how Google uses this information.

Note: The DIY Advisor assumes no liability for omissions, errors or the outcome of any jobs. The reader must always exercise reasonable caution, follow current codes and regulations that may apply, and is urged to consult with a licensed contractor if in doubt about any steps on these posts. All names were changed to protect client's privacy. DIY Advisor. Reproduction of site content including photos without permission prohibited. All rights reserved. © Copyright 2011-

How to Hang Pre-hung Door - Part 15 of 15 - Old Door Cut to Trash

Fig.1 Dewalt® Cordless saw
By Gary Boutin

Supplies and Tools:
Cordless saw
Carpenter pencil  
Dewalt® Cordless radial saw
Measuring tape

Mr. Victor Longpont hired my services to remove his garage door that had become damaged after a bad rain storm. The door had not been painted for over 30 years, the bottom of the door was damaged by a badly worn door sweep that allowed water into the bottom of the door. 

This post shows the three steps on how easy it is to cut a door with a cordless saw.

Step 1: Fig.1 is a Dewalt® 18-Volt 6-1/2 inch cordless circular saw. 
Step 2: Fig.2 shows the handyman preparing to cut the damaged door. Use a carpenter pencil and a measuring tape to mark the door cuts. The cuts needs to be the size of the trash can or smaller. Its easier to follow a line than to just pull the saw down the door and its good practice.
Fig.2 Cutting the door
Step 3: Fig.3 shows that once the lines have been drawn, use the saw to cut the door. Follow the lines on the door. Let each piece drop to the cement for later disposal.

Fig.3 Side view
Step 4: Fig.4 shows the door is in the trash can.
Fig.4 In trash

How to Hang a Pre-hung Door:


  • Part 1 of 15 Introduction Why Replace This Garage Door
  • Part 2 of 15 Removing The Damaged Door
  • Part 3 of 15 Door Hardware Removed
  • Part 4 of 15 Door Threshold Removal
  • Part 5 of 15 Installing Door
  • Part 6 of 15 Recycled Metal Removed
  • Part 7 of 15 Caulking Outside Door Edges
  • Part 8 of 15 New Door Hardware Installed
  • Part 9 of 15 Caulking Door Screws Holes
  • Part 10 of 15 Inside Door Mud
  • Part 11 of 15 Inside Door Taping
  • Part 12 of 15 Inside Door Painted
  • Part 13 of 15 Applying Stucco To Door Edge
  • Part 14 of 15 Exterior Door Molding
  • Part 15 of 15 Old Door Cut to Trash


  • Update: DIY Advisor has New blogs check them today:

    • Cookie Alert: European Union laws requires that you know that this blog uses cookies. If you are concerned about this please click here to see how Google uses this information.

    Note: The DIY Advisor assumes no liability for omissions, errors or the outcome of any jobs. The reader must always exercise reasonable caution, follow current codes and regulations that may apply, and is urged to consult with a licensed contractor if in doubt about any steps on these posts. All names were changed to protect client's privacy. DIY Advisor. Reproduction of site content including photos without permission prohibited. All rights reserved. © Copyright 2011-

    Sunday, May 12, 2013

    How to Hang Pre-hung Door - Part 13 of 15 - Applying Stucco To Door Edge

    Fig.1 Quikrete Stucco
    By Gary Boutin

    Supplies and Tools:
    Broom and dustpan
    Paint scraper knifes
    Quickrete stucco
    Measuring cut
    mixing tub

    Mr. Victor Longpont hired my services to remove his garage door that had become damaged after a bad rain storm. The door had not been painted for over 30 years, the bottom of the door was damaged by a badly worn door sweep that allowed water into the bottom of the door.

    This post shows the nine steps on how to seal the outside edges of the door. 

    Step 1: First purchase stucco mix. Above fig.1 shows Quickrete stucco purchased at The Home Depot. This bag has enough dry stucco to do several door jobs. 
    Step 2: Fig.2 shows the stucco dry mix is removed from the paper bag and placed inside a mixing tub.
    Fig.2 Dry Stucco
    Step 3: Fig.3 shows that mixing with water until the stucco is the same mixture as peanut butter.  Not to dry and not to wet in between.
    Fig.3 Peanut Butter consistency
    Step 4: Fig.4 shows the paint scraper knife applying stucco to the edge of the door. Fig.5 shows that the job starts at the bottom and needs to go around the entire door until finished.

    Fig.4 Use a flat scraper
    Fig.5 Start at bottom 
    and work up
    Step 5: Fig.5 shows the left side of the door finished. The stucco has been applied to the entire door edges. Fig.6 shows that after the job is finished the last job is to pick up the floor.  It's much easier to pick up wet stucco than dried stucco off the floor. Use a floor broom and a dustpan. Throw away the used stucco into the garbage can. The next step is to prime the stucco after it has dried.
    Fig.5 left side 
    completely done
    Fig.6 Stucco tub, 
    broom and dustpan

    How to Hang a Pre-hung Door:


  • Part 1 of 15 Introduction Why Replace This Garage Door
  • Part 2 of 15 Removing The Damaged Door
  • Part 3 of 15 Door Hardware Removed
  • Part 4 of 15 Door Threshold Removal
  • Part 5 of 15 Installing Door
  • Part 6 of 15 Recycled Metal Removed
  • Part 7 of 15 Caulking Outside Door Edges
  • Part 8 of 15 New Door Hardware Installed
  • Part 9 of 15 Caulking Door Screws Holes
  • Part 10 of 15 Inside Door Mud
  • Part 11 of 15 Inside Door Taping
  • Part 12 of 15 Inside Door Painted
  • Part 13 of 15 Applying Stucco To Door Edge
  • Part 14 of 15 Exterior Door Molding
  • Part 15 of 15 Old Door Cut to Trash


  • Update: DIY Advisor has New blogs check them today:

    • Cookie Alert: European Union laws requires that you know that this blog uses cookies. If you are concerned about this please click here to see how Google uses this information.

    Note: The DIY Advisor assumes no liability for omissions, errors or the outcome of any jobs. The reader must always exercise reasonable caution, follow current codes and regulations that may apply, and is urged to consult with a licensed contractor if in doubt about any steps on these posts. All names were changed to protect client's privacy. DIY Advisor. Reproduction of site content including photos without permission prohibited. All rights reserved. © Copyright 2011-