Showing posts with label flat tipped screwdriver. Show all posts

Saturday, September 17, 2016

How to Repair a Cooling Fan - Part 1 of 3 - Opening the Case

ThreeLeaf Logo
By Gary Boutin

Tools and Supply:
Flat tipped screwdriver
Needlenose pliers

We purchase two ThreeLeaf T102 - Laptop Cooling Pad with (Dual 6" Internal Copper-fans @ 1200 rpm each, Ultra Thin 1.5" Pad) retail price $39.99 each and Amazon,com Internet price was $12.99 each.

This post shows the three steps which on the process to repair the back up switch for the fireplace.

Step 1: Below is the product description, and technical details that might help you decide your cooling fan basic needs.


Size 12"-15.6"[2 fans] | Color: BLACK


The Bujian, based in Shenzhen of China has over 4 years of experience specialized in Laptop cooling pads.


T102 Cooling pad is the best way to keep 11-15.6"laptop cool and free from overheating.

Bujian T102 Blue lights Cool Pad
Inner fan 2-Copper coil and two fans
Fan size 5.6"" x 5.6"" each
Speed 1200-Revolution per minute (RPM) each fan
Output air 74 C.R.M.
USB line 3-millimeter line
Noise 21-decibels (dBA)
Stand Adjustable stand, ergonomic 15 degree legs, plastic only with metal screen on top, weight 1/3 pound.
30-days return policy Life time maintenance for product defects and 30 day no hassle return and refund for incompatibility.
Wholesale Packing Inner bubble bag inside Kraft box.

Technical Details ThreeLeaf
Item model number T102BLACK-US
Product Dimensions 14.8 x 10.4 x 1.4 inches
 L x W x H 14.76 x 10.43 x 1.38 inches
 Color Black
 Foot pads 4-Shockproof Rubber pads

Step 2: You might think armed with this information above that you might understand what the unit could do. That would also include the 30-day return policy which was lost to me as the device was not working.
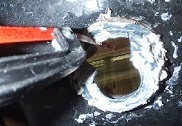
Step 3: Fig.1 shows the fan has four metal tabs and only one tab is shown below. There are four tabs on each side of the device. Fig.2 shows a flat screwdriver is the best method of releasing each of these. There are 8-metal tabs that have to be pushed back to remove the top metal grilled layer. The next post will show what wire needs to be placed on each wire nut and then checked to see if the repairs worked.

Tip: If you have these ThreeLeaf Cooling Fan and its under 30 days call the manufacturer and return the cooling fan.
Fig.1 Metal Tabs
Fig.2 Flat tipped screwdriver
How to Repair a Cooling Fan:


  • Cookie Alert: European Union laws requires that you know that this blog uses cookies. If you are concerned about this please click here to see how Google uses this information.

Note: The DIY Advisor assumes no liability for omissions, errors or the outcome of any jobs. The reader must always exercise reasonable caution, follow current codes and regulations that may apply, and is urged to consult with a licensed contractor if in doubt about any steps on these posts. All names were changed to protect client's privacy. DIY Advisor. Reproduction of site content including photos without permission prohibited. All rights reserved. © Copyright 2011-

Saturday, March 8, 2014

How to Remove a Leaking Sink Basket - Part 1 of 2 - Removal

Fig.1 Caulked sink basket
By Gary Boutin
 
Supplies and Tools:  
Channel Locks pliers
Hacksaw with new blade
Flat tipped screwdriver

Mrs Stone wanted her kitchen sink to stop leaking. She called my repair service to solve her problem.

This post shows eight steps to remove a severely caulked sink basket. 

Step 1: Upper right fig.1 shows the sink basket that has many layers of latex caulking. A prior handyman had decided to apply bathroom caulking over the entire sink basket to stop it from leaking instead of replacing the part.
Step 2: Fig.2 shows the brass vertical pipe which has the brass nut unscrewed from the transverse arm of the sink system.
Fig.2 Pipes connected
Step 3: Fig.3 shows the horizontal pipe removed and on the kitchen sink cabinet.

Fig.3 Transverse pipe
Step 4: Fig.4 shows the caulking still remains around the sink basket.
Fig.4 Only caulking and sink basket
Step 5: Fig.5 and fig.6 shows the old sink basket had to be pried out of the sink drainage. A screwdriver is prying off the edges of this metal sink basket.
Fig.5 Underneath sink
Fig.6 Basket lip pried up

Step 6: Fig.7 shows the old sink basket has been removed from the kitchen sink.
Fig.7 Damaged plastic 
basket inside sink

Step 7: Fig.8 shows the sink basket has been removed and the sink flange needs to be cleaned prior to installing the new one.
Fig.8 White sink basket removed

Step 8: Fig.9 shows the new sink basket that will be placed into the sink.

Fig.9 New sink basket

How to Remove a Leaking Sink Basket:
  • Part 1 of 2 - Removal
  • Part 2 of 2 - Installing the Sink Basket

Update: DIY Advisor has New blogs check them today:

  • Cookie Alert: European Union laws requires that you know that this blog uses cookies. If you are concerned about this please click here to see how Google uses this information.

Note: The DIY Advisor assumes no liability for omissions, errors or the outcome of any jobs. The reader must always exercise reasonable caution, follow current codes and regulations that may apply, and is urged to consult with a licensed contractor if in doubt about any steps on these posts. All names were changed to protect client's privacy. DIY Advisor. Reproduction of site content including photos without permission prohibited. All rights reserved. © Copyright 2011-

Saturday, March 1, 2014

How to Install Iron and Board Rack

Fig.1 Iron Board Holder
By Gary Boutin

Supplies and Tools:
Iron board hanger kit: Screws, paper template, plastic anchors
Claw hammer
Phillip screwdriver-manual
Torpedo level


Mrs. D wanted an iron and board frame installed in her home. She was fed up with the iron falling off the dryer and or the iron board falling behind her laundry door. She called my repair service to install the iron board kit.

This post shows the six steps to install the iron board metal frame.

Step 1: Fig.1 shows the frame of the iron board hanger.
Step 2: Fig.2 through fig.5 shows the progression of punching a hole into the wallboard. Use the new iron board metal frame for the exact location for the holes or the paper template that comes with the packaging. If by chance the driver hits a wood stud, do not use the plastic hanger just screw into the wall the metal screw.
Fig.2 Place the screwdriver 
into the Hole
Fig.3 Punch the driver into the hole
Fig.4 Push the driver 
into wood stud
Fig.5 Place the plastic anchor 
and hammer the anchor
Step 3: Fig.6 shows that after the holes are punched out use the plastic anchors with metal screws.
Fig.6 Anchor is ready for use
Step 4: Fig.7 shows the metal frame that will hang on top of the screws. Use a Torpedo level to make sure the frame is level.
Fig.7 Iron board frame
Step 5: Fig.8 and fig.9 shows the metal screws are tightened against the metal frame so that it will hold the clothe equipment. If you have the chance to use metal screws into the wood studs that would be the best bet for a strong frame. This iron board frame was not in the wood studs and only being held by the wall anchors.
Fig.8 Metal rack bottom holes
Fig.9 Metal rack top holes
Step 6: Fig.10 shows clothe iron on the metal frame.
Fig.10 Iron top frame
Step 7: Fig.11 shows the clothing iron and iron board are hanging from the metal frame.
Fig.11 Job finished

Update: DIY Advisor has New blogs check them today:

  • Cookie Alert: European Union laws requires that you know that this blog uses cookies. If you are concerned about this please click here to see how Google uses this information.

Note: The DIY Advisor assumes no liability for omissions, errors or the outcome of any jobs. The reader must always exercise reasonable caution, follow current codes and regulations that may apply, and is urged to consult with a licensed contractor if in doubt about any steps on these posts. All names were changed to protect client's privacy. DIY Advisor. Reproduction of site content including photos without permission prohibited. All rights reserved. © Copyright 2011-