Showing posts with label Vicegrip® Pliers. Show all posts

Tuesday, April 21, 2015

How to Replace 2005 Lincoln LS Brake Console Switch

Fig.1 Ford 2005 Lincoln
LS automobile
By Gary Boutin
 
Supplies and Tools:
Brake console switch - $30
Electrical Star screwdriver (black handle)
Electrical stripper (Yellow handles)
Electrical tape
Pliers standard (Orange handles) 
Needlenose pliers
Putty scraper
Vicegrip® pliers 

Mrs. Stone drives a Ford 2005 Lincoln LS automobile pictured right top of this page. While at the car wash a worker pushed in the brake console switch inside the interior console. This post shows how to replace this part. 

This post shows the ten steps on how to repair 2005 Lincoln LS Brake Console Switch Replacement.
Step 1: Fig.1 shows a Ford 2005 Lincoln LS automobile.
Step 2: Fig.2 shows the tools; Phillip screwdriver, Electrical Stripper, Pliers (standard), Needlenose pliers, Putty Scraper and Vicegrips® Pliers.
Fig.2 Tools for this job
Step 3: Fig.3 shows the coffee cup tray console that housed the brake handle, brake light switch (dark rectangular hole bottom left) and two side by side traveling coffee holders. The bottom black rectangle is the area of interest for this post. Use the putty scraper in combination with a flat end screwdriver in fig.1 to removed the console cover by prying the edges and pull outwards. Pull slowly because the cover has two switches attached to the back portion. In this case only one the brake handle was attached. 
Fig.3 Console cover tray
Step 4: Fig.4 shows the cover removed and interior electrical wires. The black brake switch bottom of the picture is the switch that needs to be replaced. When the brake switch was pushed down the mounting plate was broken off so the switch had to be replaced.
Fig.4 inside console
Step 5: Fig.5 shows an upside down coffee cup tray, the rectangle in the bottom of this picture is were the switch is suppose to be. Try to push the tray to the side so you can reach the electrical wiring.
Fig.5 Underneath 
coffee tray
Step 6: Fig.6 shows the hand brake cable. There is no need to remove this but it does give more room to get to the electrical wiring.
Fig.6 Brake cable
Step 7: Fig.7 shows the black electrical tape that will need to be removed to get to the electrical junction. Sometimes the wires at the back of the switch can be pulled off and replaced on the new switch. But in this case the wires were part of the switch.
Fig.7 Wire junction
Step 8: Fig.8 shows that the black electrical tape was removed revealing the junction between the brake switch and the orange power line. Pull the lines apart and release it from the orange cable. Use a razor knife to remove the black electrical tape and to reapply the tape back on the new switch wiring. Electrical stripper were used to remove the existing wiring and to place the new switch wiring.

Note: Remember how electrical junction was removed because the new switch will need to be put back on.
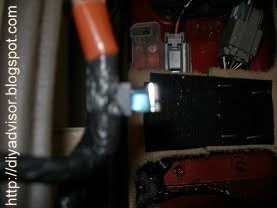
Fig.8 Tape removed
Step 9: Fig.9 shows the removal and replacement of the brake switch using a Star Screwdriver. Remove or replace take two screws from the new brake light switch
Fig.9 New brake light switch
Step 10: Fig.10 shows both switches are ready to be placed into the console.
Fig.10 New switch 
and cable installed
Step 11: Fig.11 and fig.12 shows the cover being placed back into the center console. Install in reverse order of the removal.
Fig.11 Tap both sides 
of console lid
Fig.12 Pushing lid in place

Lincoln LS E-books:

Update: DIY Advisor has New blogs check them today:
  • Cookie Alert: European Union laws requires that you know that this blog uses cookies. If you are concerned about this please click here to see how Google uses this information.


Note: The DIY Advisor assumes no liability for omissions, errors or the outcome of any jobs. The reader must always exercise reasonable caution, follow current codes and regulations that may apply, and is urged to consult with a licensed contractor if in doubt about any steps on these posts. All names were changed to protect client's privacy. DIY Advisor. Reproduction of site content including photos without permission prohibited. All rights reserved. © Copyright 2011

Saturday, March 7, 2015

How to Replace Kitchen Cabinet Sink Base - Part 1 of 2 - Removal

Fig.1 Wood base under kitchen sink
By Gary Boutin
 
Supplies and Tools:  
Broom
Bucket 
Dust pan
Hammer claw
Scrape
Vicegrip® Pliers

Dr. Jorge Valvus a former client called about replacing his kitchen sink base cabinet shelf. He had purchased the parts but was unable to see how to replace the damage shelf. He had called several local handyman to bid the job since he was renting the home, but none would come for his price. 

There are two post for this job. This is the first post of two, that shows the seven steps and fourteen pictures on how to solve this problem.  

Step 1: Fig.1 through fig.3 above and below shows the kitchen cabinet tile and shelf damages.
Fig.2 Damaged shelf
Fig.3 Plug light shows damages
Step 2: Fig.4 shows the damages that occurred after a year of not repairing a sink leak. 
Fig.4 Pulling tile floor tiles
Step 3: Fig.5 and fig.6 show that both sides of the shelf are wet and completely rotten from lack of maintenance.
Fig.5 Garbage disposal side
Fig.6 Right side of sink
Step 4: Fig.7 shows that the removal of the kitchen base is being removed and placed into a bucket to easy removal. Fig.8 shows that small edges of the original shelf needed to be removed.
Fig.7 Remove wet boards
Fig.8 Removal process
Step 5: Fig.9 and shows the shelf has been removed but some pieces are left behind and need to be scraped off before applying the new shelf. Fig.10 shows the old nails need to be removed too before the new shelf is placed inside the cabinet.
Fig.9 Hammer the pieces off
Fig.10 Scrape the middle
Step 6: Fig.11 and fig.12 shows that all the rusted nails need to be removed from the base of the cabinet otherwise the new shelf may not be level and lay flat on the wooden base.
Fig.11 Vicegrip® pliers pulls out nails
Fig.12 Remove cabinet nails
Step 7: Fig.13 and fig.14 shows only saw dust is left and a dustpan with a wide scraper will help remove the saw dust from the kitchen floor. The next post will show the steps to place the new base cabinet shelf.
Fig.13 Dustpan and scraper
picked up mess
Fig.14 Saw dust to be removed
How to Replace a Kitchen Cabinet Sink Base:

Update: DIY Advisor has New blogs check them today:
  • Cookie Alert: European Union laws requires that you know that this blog uses cookies. If you are concerned about this please click here to see how Google uses this information.

Note: The DIY Advisor assumes no liability for omissions, errors or the outcome of any jobs. The reader must always exercise reasonable caution, follow current codes and regulations that may apply, and is urged to consult with a licensed contractor if in doubt about any steps on these posts. All names were changed to protect client's privacy. DIY Advisor. Reproduction of site content including photos without permission prohibited. All rights reserved.© Copyright 2011-