Showing posts with label sewing awl kit. Show all posts

Sunday, April 7, 2013

How to Save Your Favorite Slipper - Part 2 of 2 - Stitching for Strength

Fig.1 Gary's slippers
By Gary Boutin

Supplies and Tools:
80-grit belt sand paper
Nitrile disposable gloves
Painters tarp
Saddle stitching

Sewing awl kit
Waxed thread 5 cord linen
35-pound tensile strength

My Christmas slippers lasted five years and were made of a lambs wool upper, collared slippers in white, double-face sheepskin uppers, fully lined in genuine sheepskin, rubber sole, size at 13.

This post shows the nine steps continuing from Part 1 of 2 - how to mend my favorite slippers.

Step 1: Fig.1 shows the slippers received for Christmas.
Step 2: After three hours the clamps were released from the slippers. Fig.2 shows the two slippers that had clamps placed around each of the bad areas. Now only a few are on the slippers were areas were still gaping.
Fig.2 Both slippers are clamped
Step 3: The slippers did not gap. Fig.3 shows that the clamp was still on to make sure that this area of the uppers did not come loose because it was a stress point in the slipper. Fig.4 and fig.5 shows that the gaps in the back and in the front of the slipper have held close to the rubber sole.
Fig.3 Clamp
Fig.4 Back
Fig.5 Front
Step 4: After the glue has dried use 80-grit belt sand paper to remove the excess glue on the sole of the slippers.
Step 5: After 24-hours add a few saddle stitches to key damage areas into the soles of the shoes.
Step 6: To accomplish the saddle stitching the leather of the slippers uppers need to be cut in a diagonal angle.  
Step 7: Try to place the holes in the same diagonal pattern.  
Step 8: Use an awl with built in waxed thread and lace them into the holes of the leather and the rubber soles. This take a bit of practice, just do the best you can, the goal here is to give the slipper just a little more strength on badly damaged areas. Fig.6, fig.7 and fig.8 shows to starts the awl into the sole of the leather and into the other side. Pull the thread into the loop and place the next needle into the next hole. Do all the holes in the damaged area.
Fig.6 Waxed thread
Fig.7 Awl
Fig.8 Saddle stitching
Step 9: Fig.9 shows the lamb wool slippers presently in better condition. The guess is that these slippers will last at least the end of the year.
Fig.9 Slippers

How to Save Your Favorite Slipper:


Update: DIY Advisor has New blogs check them today:

  • Cookie Alert: European Union laws requires that you know that this blog uses cookies. If you are concerned about this please click here to see how Google uses this information.

Note: The DIY Advisor assumes no liability for omissions, errors or the outcome of any jobs. The reader must always exercise reasonable caution, follow current codes and regulations that may apply, and is urged to consult with a licensed contractor if in doubt about any steps on these posts. All names were changed to protect client's privacy. DIY Advisor. Reproduction of site content including photos without permission prohibited. All rights reserved. © Copyright 2011-

How to Save Your Favorite Slipper - Part 1 of 2 - Taking Apart and Gluing the Slipper Heel

Fig.1 Slippers
By Gary Boutin

Supplies and Tools:
80-grit belt sand paper
Nitrile disposable gloves
Loctite professional performance adhesive spray
Painters tarp
Saddle stitching
Sewing awl kit

Vice grips® pliers
Waxed thread 5-cord linen 35-pound tensile strength

One would think they should last a life time, more than seven, but they lasted five years. They are very comfortable and match my feet, but do I really want to start over again with new slippers. These slippers have a lambs wool upper, collared slippers in white, double-face sheepskin uppers, fully lined in genuine sheepskin, rubber sole, and a perfect size 13. With the way our economy is in 2013 the decision is to try to repair the slippers.

This post shows the eight steps on how to repair your favorite slippers. 

Step 1: Fig.1 shows these slippers were given as a Christmas gift in 2008.
Step 2: Look for a manufacturers name and see if you can find any information on the slipper. The material used may make a difference of the adhesive used to repair the slippers. If you have a ups code try to find it on the Internet using a search engine. These slippers were UPC #6-0155024776-3 but they were not found on the Internet. Look for identifying marks, like a trade name.
Step 3: First, find the problems with the slippers. Fig.2 and fig.3 shows the large gaps on the sides and the front of the slippers. The one on the left had more damage than the right. My decision was to use spray adhesive into the folds of the leather and the soles of the slippers.
Fig.2 One side
Fig.3 The other side
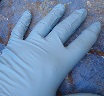
Step 4: Use the adhesive spray to bind the gaps in the slippers. Fig.4 shows the Loctite adhesive spray used for this project. Fig.5 shows nitrile blue gloves needed to protect the hands. This adhesive is difficult to remove of the skin.
Fig.4 Spray adhesive
Fig.5 Blue gloves
Step 5: Fig.6 shows the spring clamp, fig.7 and fig.8 shows 2-different types of Vice Grips® pliers used in this job. Place the spring clamps and the different vice grips on the shoes until the adhesive dries. Fig.8 also shows Alligator vice grip® to get one large area of the slipper.
Fig.6 Spring clamp
Fig.7 Vice Grips® pliers
Fig.8 Alligator vice 
grip®
Step 6: Now spray the adhesive into the gaps of the slippers, use the clamps to clamp on the glue and wait until dried. Fig.9 through fig.11 shows the adhesive is clear when sprayed but in seconds turns white on the slipper rubber soles. Fig.11 shows a spring clamp which has orange ends has been placed in the back of the slipper.
Fig.9 Adhesive leaking out
Fig.10 Clamp on back side
Fig.11 Clamp with spring clamp
Step 7:Fig.12 and fig.13 shows the clamps are in place ready for the adhesive to dry. Fig.12 shows the clamp on the badly damaged slipper both at the front and the back of the slipper. Fig.13 shows a more detail picture of the back of the slipper.
Fig.12 Clamped
Fig.13 Another view

Step 8: Fig.14 shows the less damaged slipper needed spring clamps at the base of the slipper.
Fig.14 Final Clamp
How to Save Your Favorite Slipper:

Update: DIY Advisor has New blogs check them today:

  • Cookie Alert: European Union laws requires that you know that this blog uses cookies. If you are concerned about this please click here to see how Google uses this information.

Note: The DIY Advisor assumes no liability for omissions, errors or the outcome of any jobs. The reader must always exercise reasonable caution, follow current codes and regulations that may apply, and is urged to consult with a licensed contractor if in doubt about any steps on these posts. All names were changed to protect client's privacy. DIY Advisor. Reproduction of site content including photos without permission prohibited. All rights reserved. © Copyright 2011-