 |
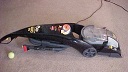
| Bissell Model #809004 |
Tools and Supplies:
Flat-end screwdriver (remove belt cover)
Bissell® 8010 Carpet Cleaner
Phillip #2 screwdriver
Portable Vacuum Cleaner
Laundry Sink with water faucet
We own the Bissell® 801004 Carpet Cleaner and after ten years the parts are not available. We acquired the unit used and the carpet cleaner worked well for another seven years. We have fur-babies (Basenji dogs) and they both shed regularly. Seven years later, the Bissell carpet cleaner keeps shutting off and overheats.
This post shows the twelve steps to remove the external parts and floor brush prior to removing the machine exterior housing.
Note: These posts addresses Bissell® carpet cleaners units that are ten years old and have no warranty by Bissel or any other warranty companies.
| 1 |  | If your Bissell® is under 1-year please click below this post for Part 1 for more information. |
| 2 |  | Like most people I searched the Internet to find out what was wrong with my Bissell®. I found this article: "My Bissell Vacuum Keeps Shutting Off and Overheats" and it suggest that their may be a clog in the unit. It gave me enough instructions to take apart the carpet cleaner and release it from any canine fur. |
| 3 |  | The first external part is called Bissell®Black Belt Cover that covers the motor belt and can be removed with a flat-tipped screwdriver. Place the tip of the screwdriver into each slot on each side and push down and the lid will raise up. |
| 4 |  |
At first look it doesn't look that bad, but on closer inspection the dog hairs is on the bottom clip of the Bissell® Black Belt Cover. |
5
|  |
This is the look without the Bissell®
Black Belt Cover. The belt is secured and there was just enough space to place my vacuum tip to pick it the dog hairs. |
| 6 |  |
Next, remove the Bissell® Smart Mix Bottle Assembly (Includes Cap). Just pull it out and remove it from its home. |
| 7 |  |
When the Bissell® Smart Mix Bottle Assembly is gone this is what is looks like when it is empty. |
| 8 |  |
This is the Bissell® Retaining Right Arm Retainer (red plastic) side of the floor brush. The metal screw is Bissell® #8 x 3/4 inch long. A Phillip #2 screwdriver will remove this metal screw. |
| 9 |  |
This is the Bissell® Retaining Left Package Arm Retainer of the Bissell® Brush Roll Assembly 6-Row and Pivot Arm Assembly. The brush screw and tip must be slid upwards to release it from the rolling brush frame. There was more dog hair here. This hair was vacuumed and removed. Both retainers were cleaned too. |
| 10 |  |
This is the Bissell® Brush Roll Assembly 6-Row and Pivot Arm Assembly. There was a tremendous amount of hair within this assembly. |
| 11 |  |
This is a Baffle & Bladder Assembly complete with float holds the soapy carpet water and also holds the dirty water on the sides of its container. |
| 12 |  |
This is the Bissell® Tank Assembly Complete (Tank-in-Tank Assembly). The Tank Assembly is in the carry mode. This is all the parts that can be removed easily. Just removing the Bissell® Brush Roll Assembly removed most of the clogs the carpet cleaner had. Still the unit had a problem and the Bissell Hood® needed to be removed. |
How To Repair a Bissell® 801004 Carpet Cleaner:
- Part 1 of 9 - Information and Repair Tools
- Part 2 of 9 - Remove External Parts and Floor Brush
- Part 3 of 9 - Removing Handle, Window Base and Hood Housing
- Part 4 of 9 - Parts Identification and Flow Indicator Base
- Part 5 of 9 - Drilling and Inserted Compression Sleeve
- Part 6 of 9 - Gluing and Attaching Brass Sleeve
- Part 7 of 9 - Flow Base Fit, Elevator Lever Arm and Hood Repair
- Part 8 of 9 - Reinstall The Vacuum Parts
- Part 9 of 9 - Putting The Bissell To Work Cleaning the Couch
Update: DIY Advisor has New blogs check them today:
- Handyman Blog: DIY Advisor
- DIY Advisor Sitemap
- Food Blog: From Kiwis To Pistachios
- Food Blog Sitemap
- Tool Blog: DIY Advisor Toolbox
- Tool Blog Sitemap
- Artwork Blog: Light in Dark Artwork
- Artwork Blog Sitemap
- Class-A Tests: DIY Class-A Drivers License Tests
- Class-A Tests Sitemap: Class-A Sitemap
- DIY Poem: DIY Poem Meter Blog
- DIY Poem Sitemap: DIY Poem Sitemap
- Cookie Alert: European Union laws requires that you know that this blog uses cookies. If you are concerned about this please click here to see how Google uses this information.
Note: The DIY Advisor assumes no liability for omissions, errors or the outcome of any jobs. The reader must always exercise reasonable caution, follow current codes and regulations that may apply, and is urged to consult with a licensed contractor if in doubt about any steps on these posts. All names were changed to protect client's privacy. DIY Advisor. Reproduction of site content including photos without permission prohibited. All rights reserved. © Copyright 2011-


